Commvault

Data Interface Pair

Quick Links to Topics:


Data Interface Pair (DIP) Overview

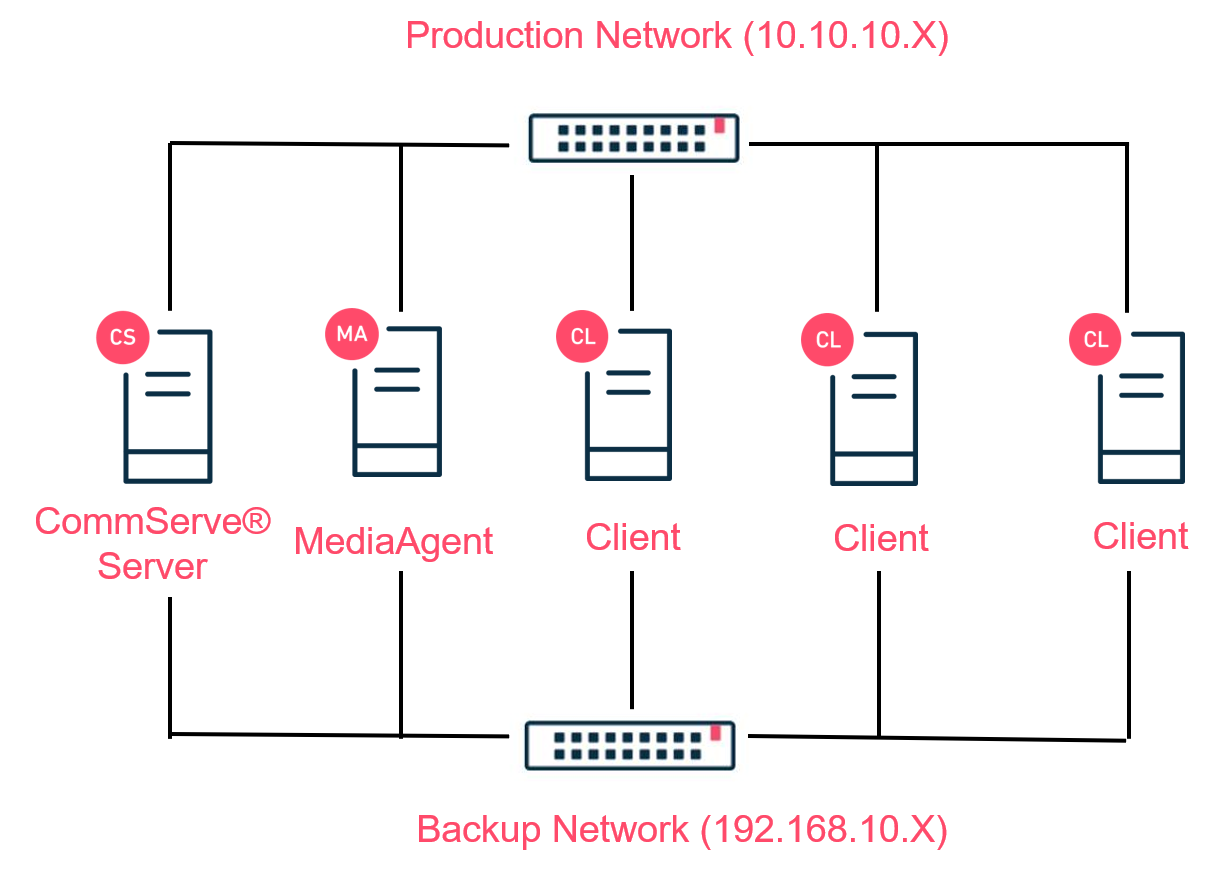
In modern data centers, network resources are crucial to production operations. Frequently, organizations are dedicating a network for data protection operations to avoid impact on production with heavy data transfer during backups. For instance, a dedicated network interface card (NIC) is used to connect to the backup network or a Virtual LAN (VLAN) that is implemented. Whichever resource is used, it is important to configure Commvault® software with the appropriate network interface to use for communication.

Illustration of a dedicated network for backup operations

Defining the network card is achieved by configuring data interface pairs (DIPs). DIPs define which network interface a computer must use when reaching the target component. It can be configured as a single pair between two computers, or as an entire subnet by configuring it at the client computer group level.


Configure a Single Data Interface Pair

In some scenarios, a client computer with multiple network interface cards may have a DIP between a server and its MediaAgent. This ensures that data can transfer on the network having access to the MediaAgent. In this case, a single DIP is configured between the two computers. The pair is configured from the Data Interface Pairs applet located in the Control Panel of the CommCell® console, or by reaching the properties of one of the two servers. Note that if one pair is configured on one server, it does not need to be configured on the other computer. The system creates the entry automatically.

Tip! You encounter a client that cannot communicate with the CommServe® server or the MediaAgent. You configured the client using its DNS name but it is having DNS resolution issues. To validate, configure a DIP between the two computers. If the server can communicate with the target component, remove the DIP. This proves that the problem is stemming from the DNS resolution since it works using IP addresses.


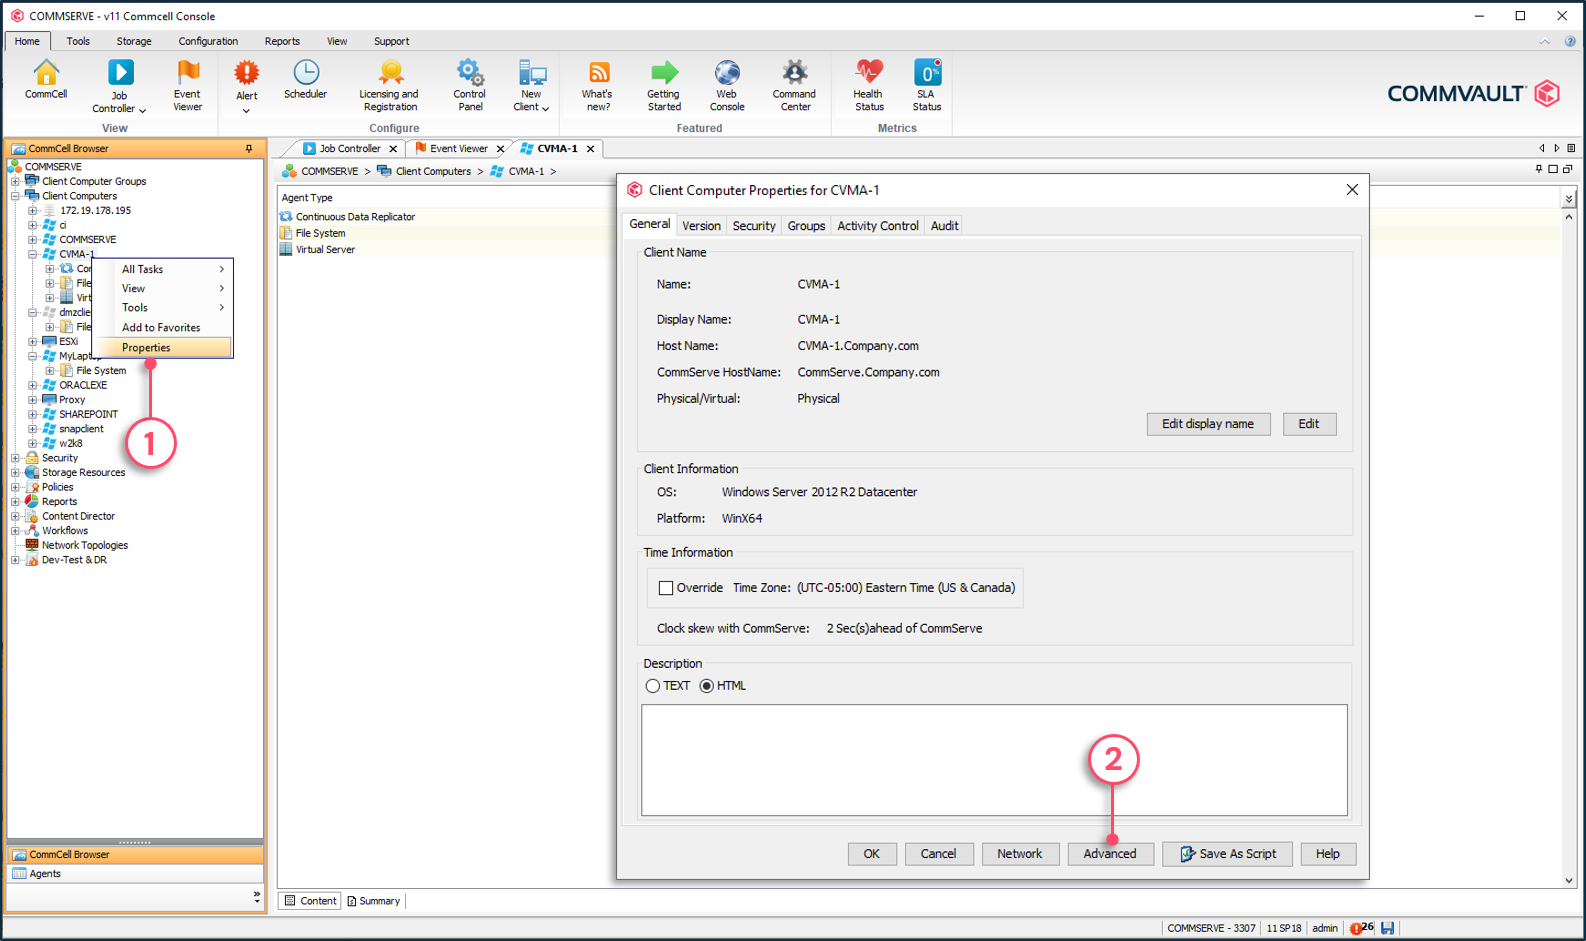
To configure a single data interface pair

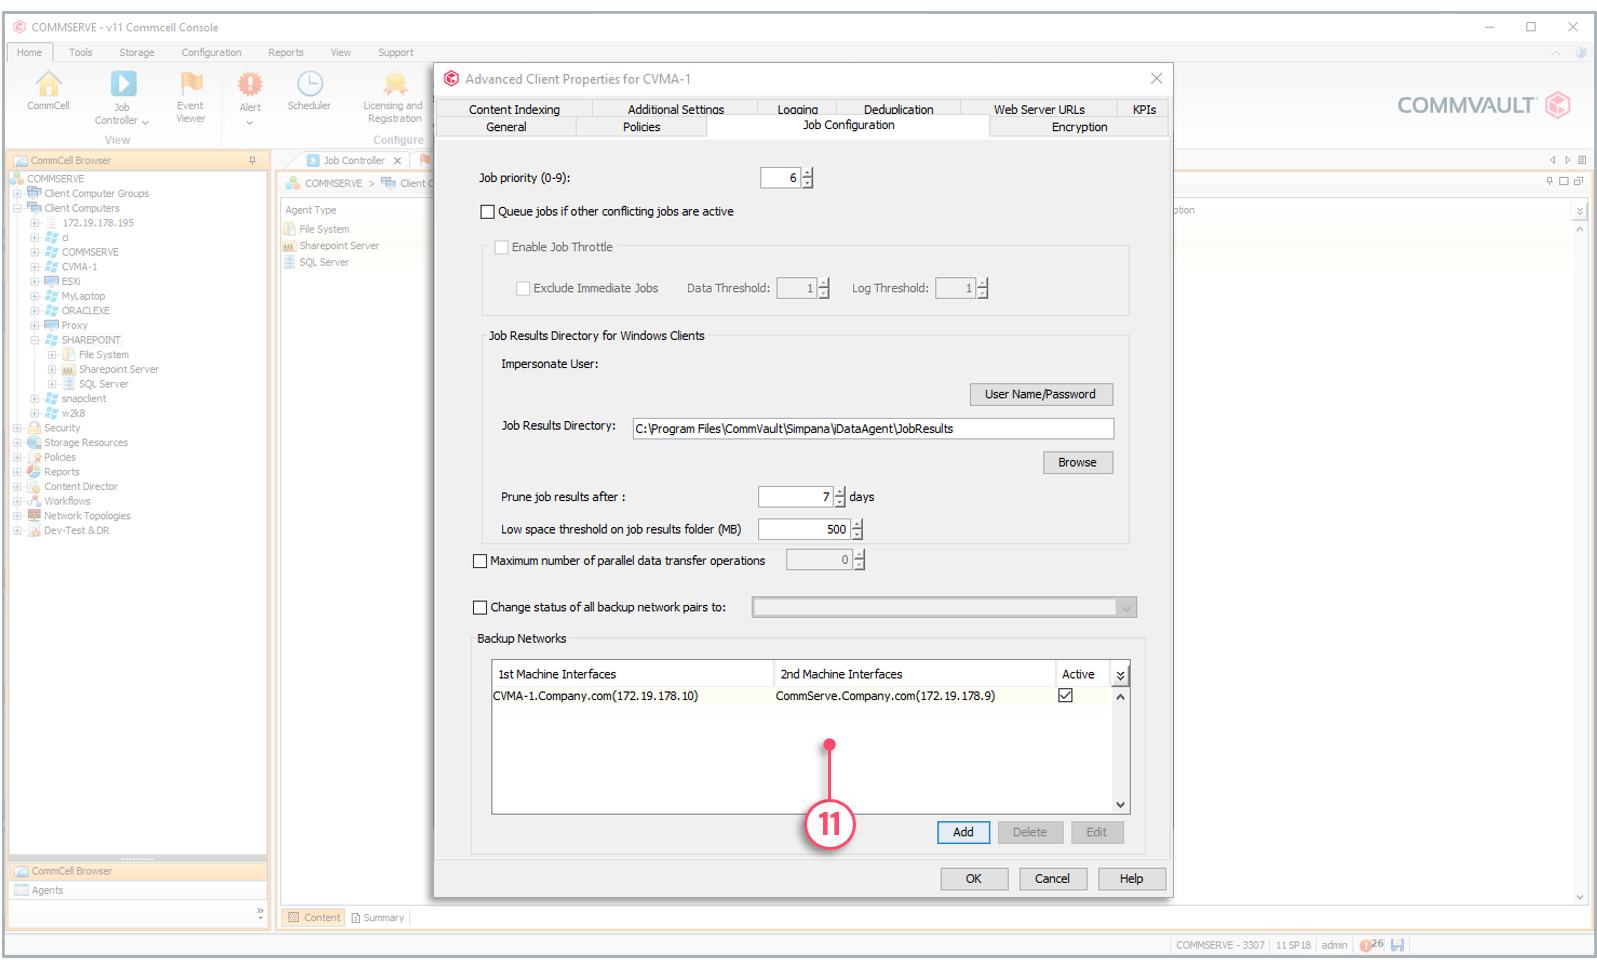
1 - Right-click one of the target computers | Properties.

2 - Click to open the advanced options window.


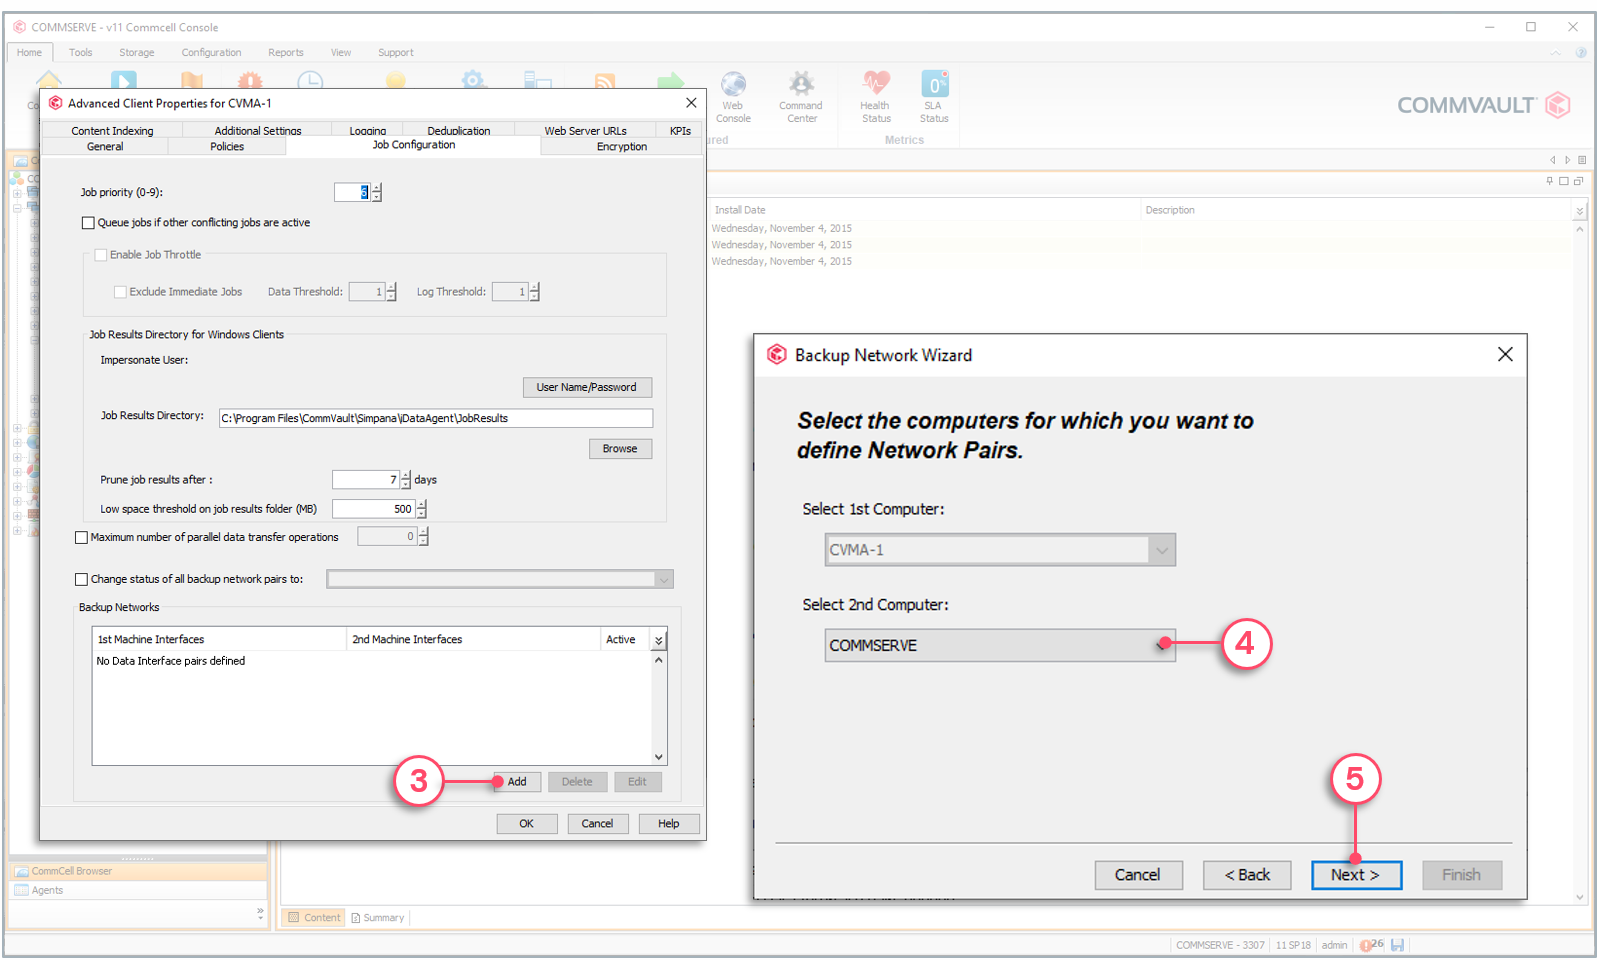
3 - Click to Add a data interface pair.

4 - Select the target computer.

5 - Click Next.


6 - Click Add to define the interfaces to use.

7 - Select the network to use for each computer.

8 - Click Next.


9 - Click Next.

10 - Click Finish.


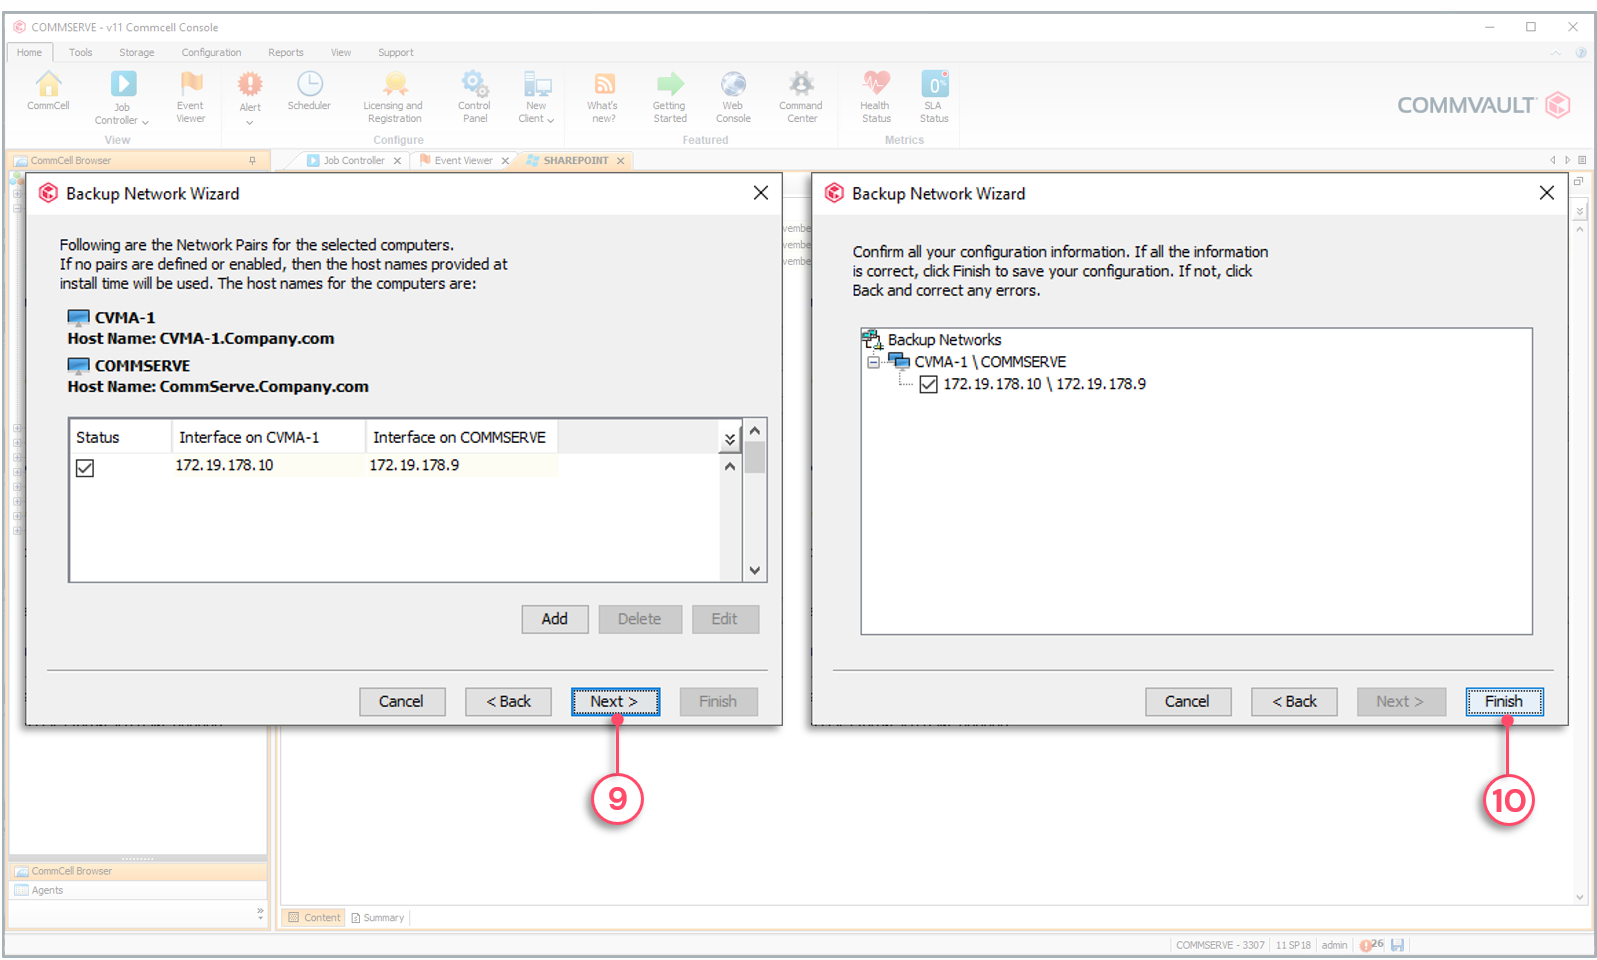
11 - The window displays the created data interface pair.


Subnet-Based Data Interface Pairs

The simplest method to define DIPs for multiple servers on the same subnet (i.e., a backup network), is to leverage client computer groups. Two groups are required; the source group and the target group. The client computer groups must be created first and DIPs can then be defined using the groups. For example, a group called Client Servers is created first, followed by all client servers associated with it. Then the built-in group Infrastructure, containing all the Commvault® related servers (CommServe® server, MediaAgents, etc.), is used to create the DIPs between all client servers and the Commvault® infrastructure servers.

When defining the subnet, the following pattern can be used:

  • Wildcard - 10.0.0.*, 192.168.100.*, *.backup.com
  • CIDR notation - 10.0.0.1/8, 192.168.100.14/24

Subnet-based DIPs must be configured from the Data Interface Pairs applet located in the Control Panel of the CommCell® console.


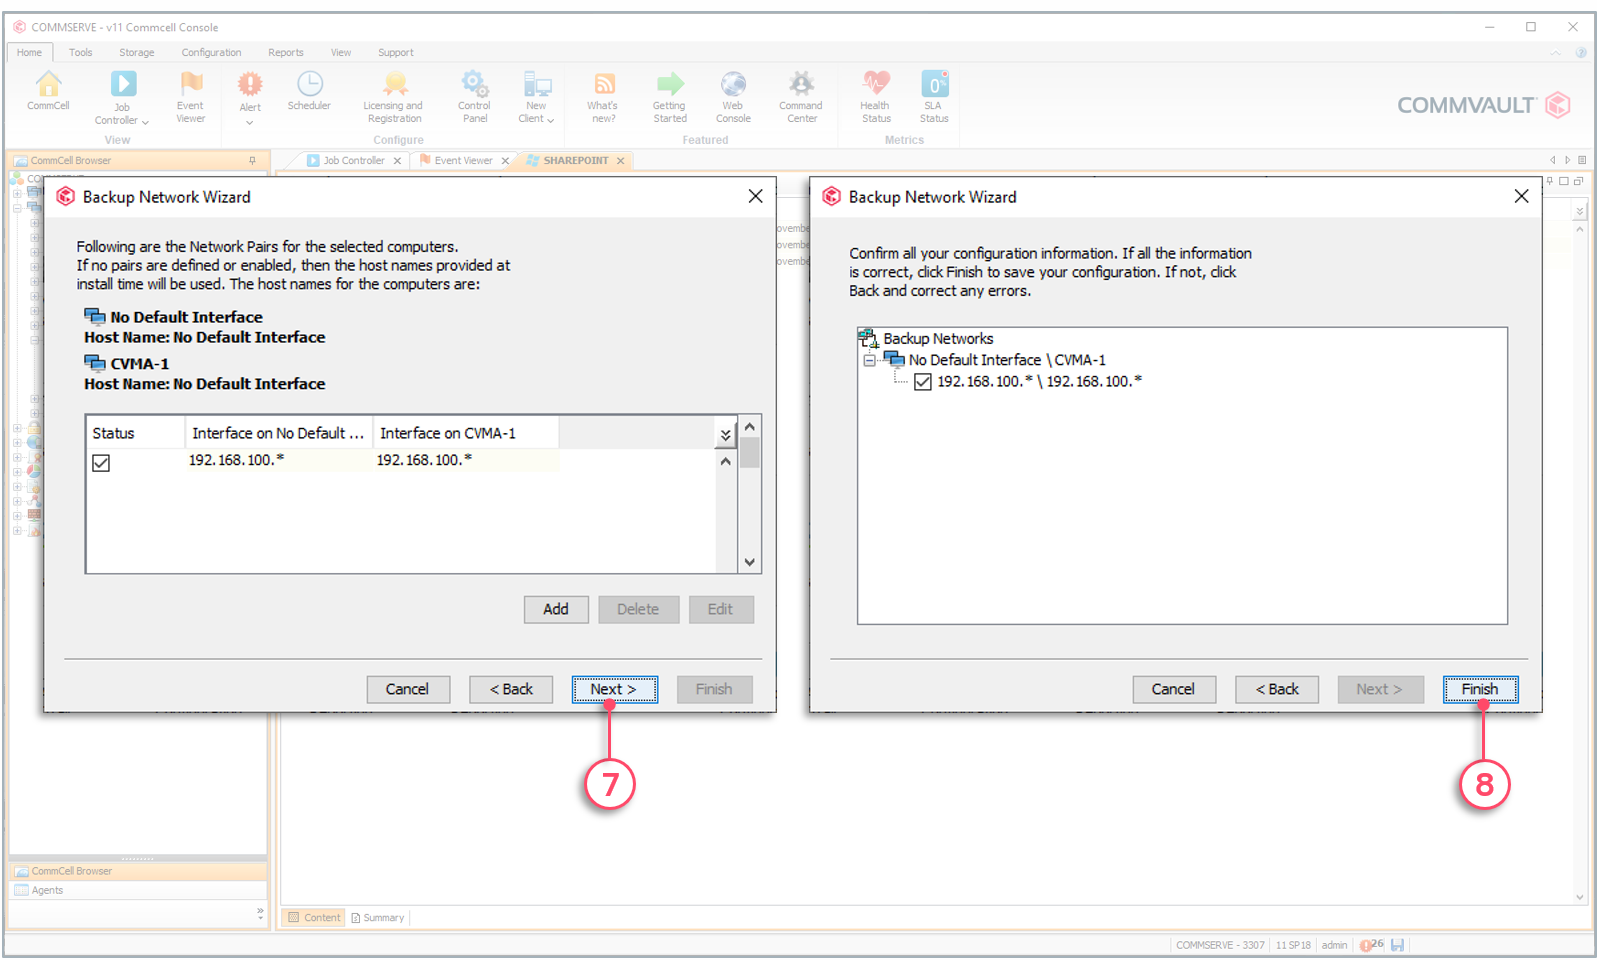
To configure a subnet-based data interface pair

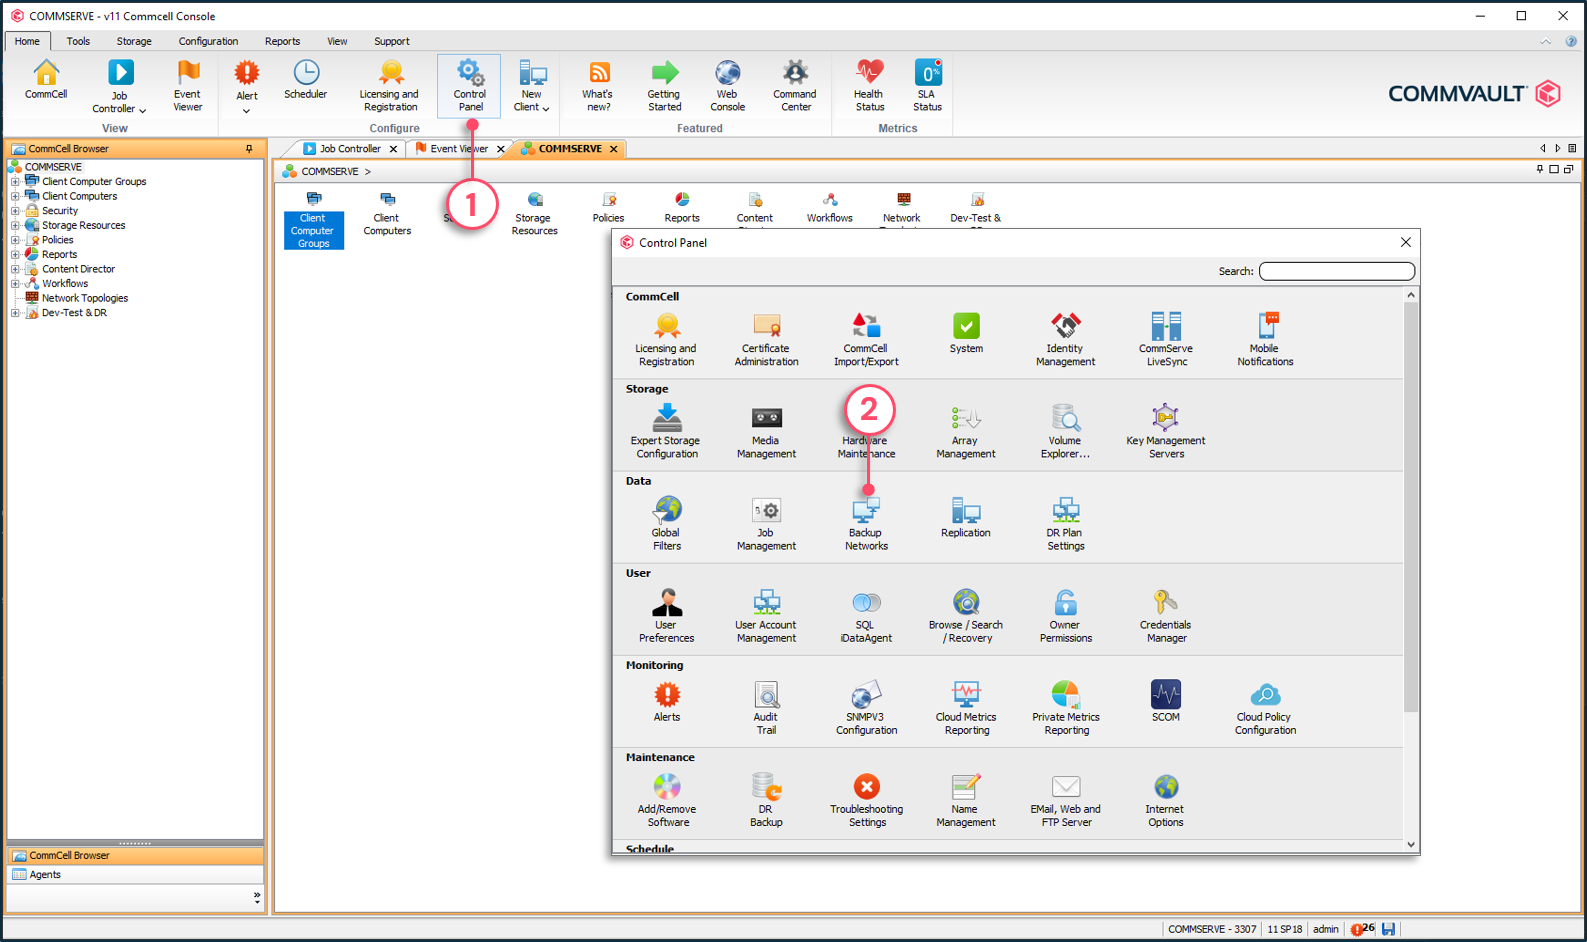
1 - From the Home tab | Control Panel.

2 - Click Backup Networks to configure data interface pairs.


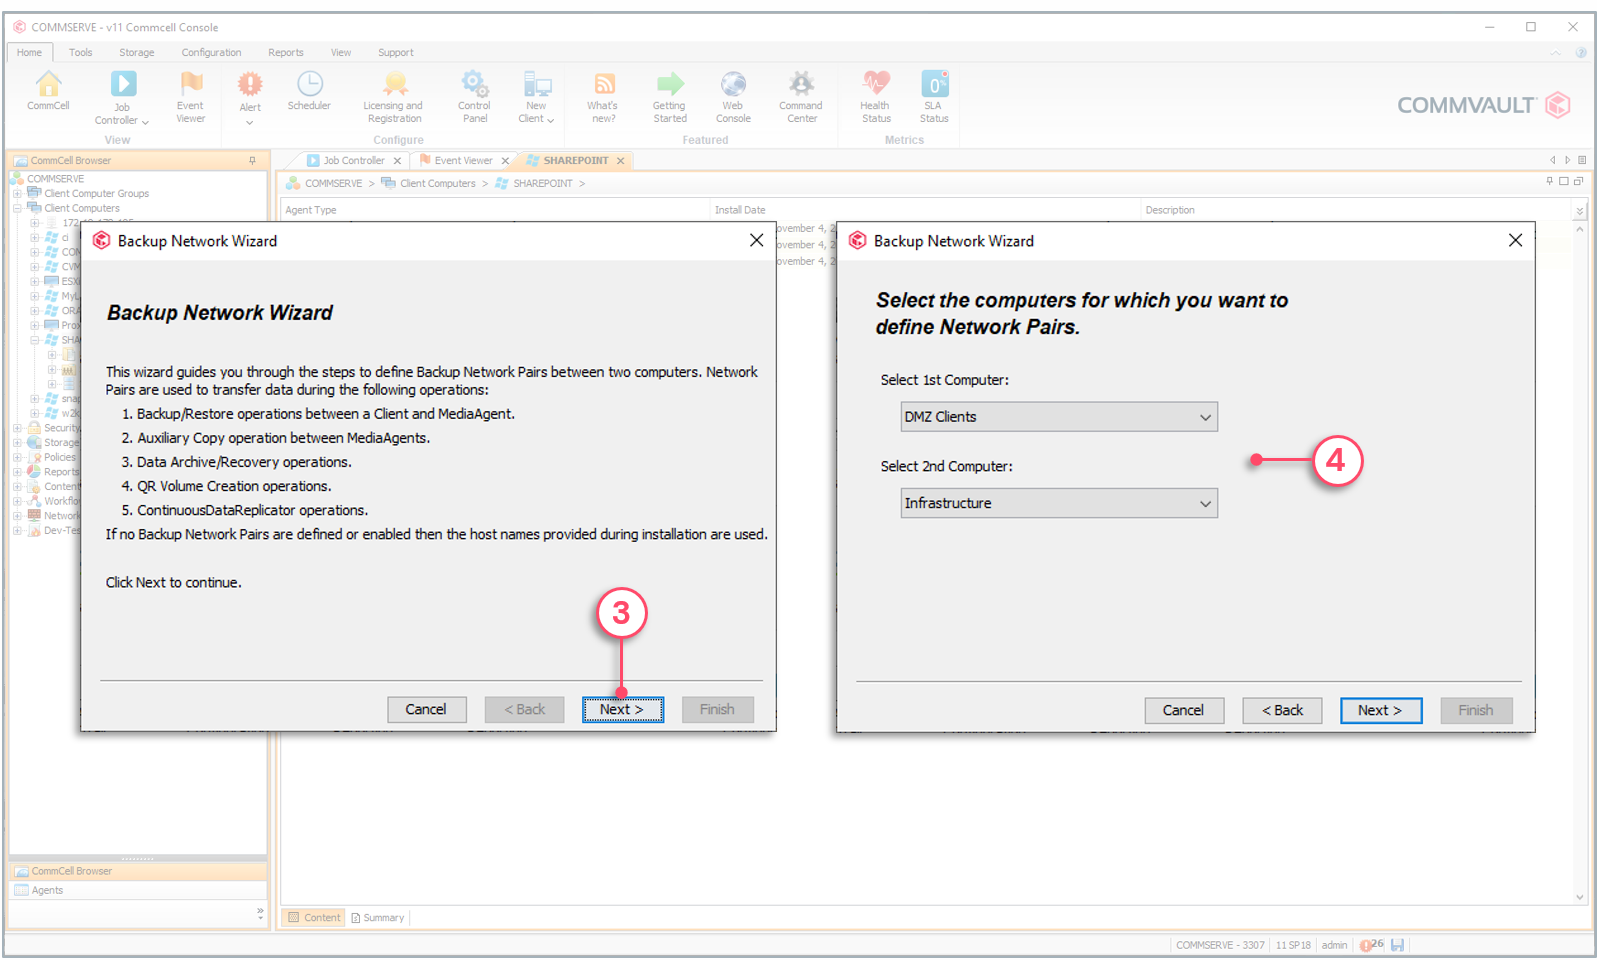
3 - Click to start the configuration.

4 - Select the source and target computer groups.


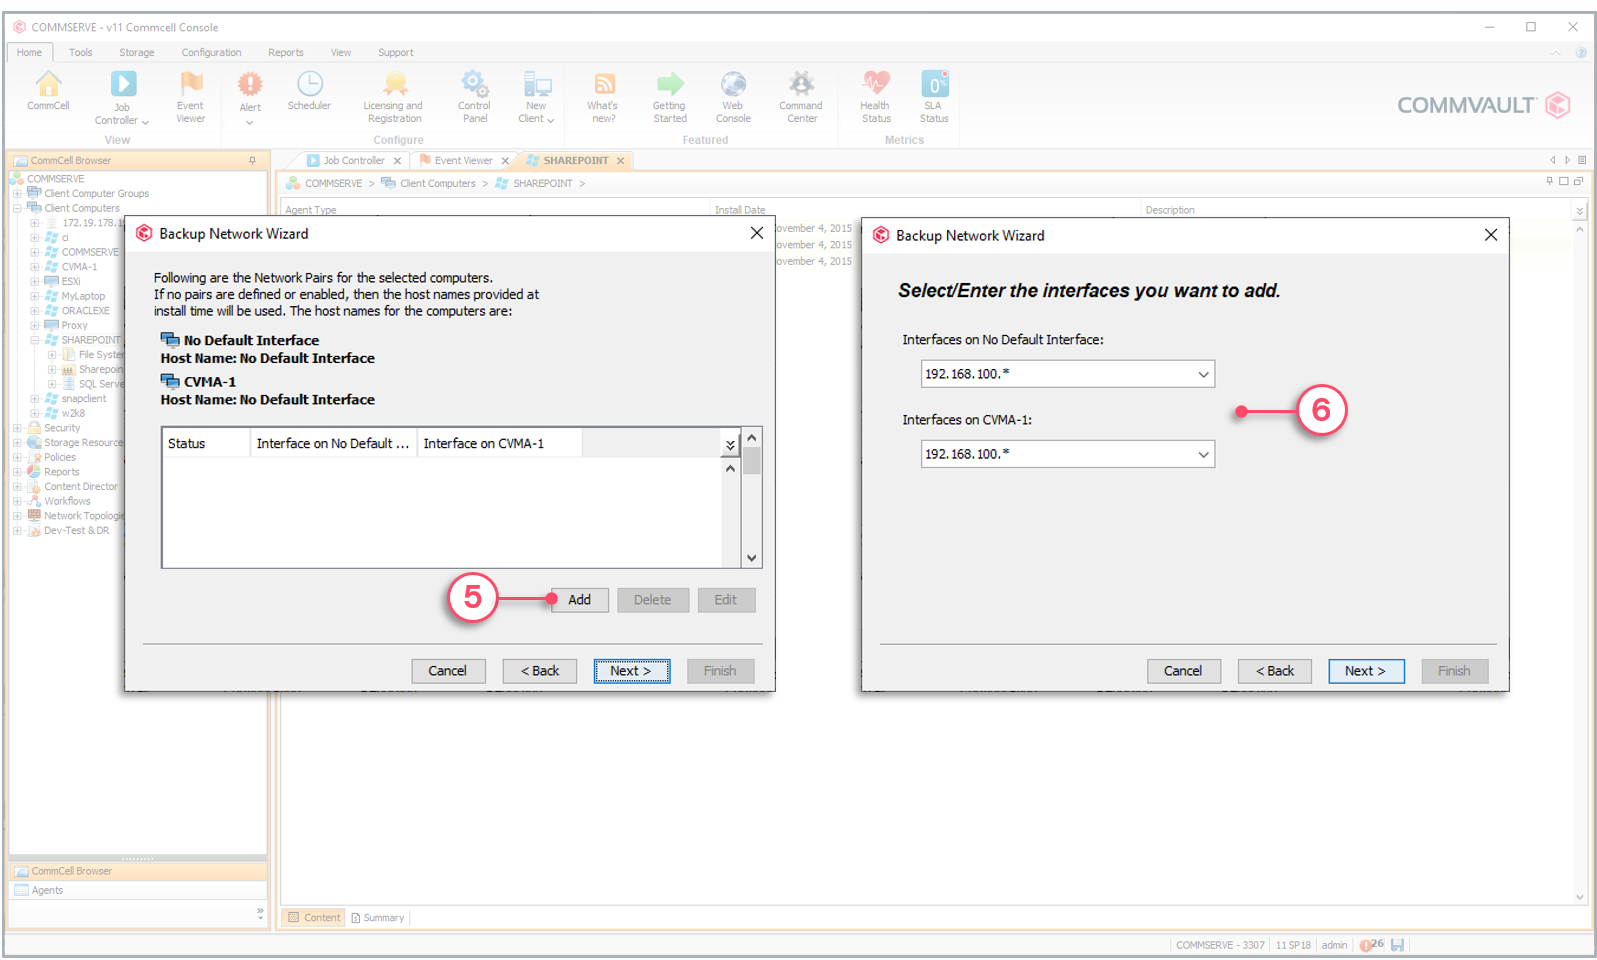
5 - Click to add a data interface pair.

6 - Define the subnets using wildcards or CIDR notations.


7 - Click Next to save the DIPS configuration.

8 - Click to apply the configuration.


Copyright © 2021 Commvault | All Rights Reserved.