Commvault
Tools
Quick Links to Topics:
Credits:
Great thanks to Mike Byrne for his hard work with the screen captures!
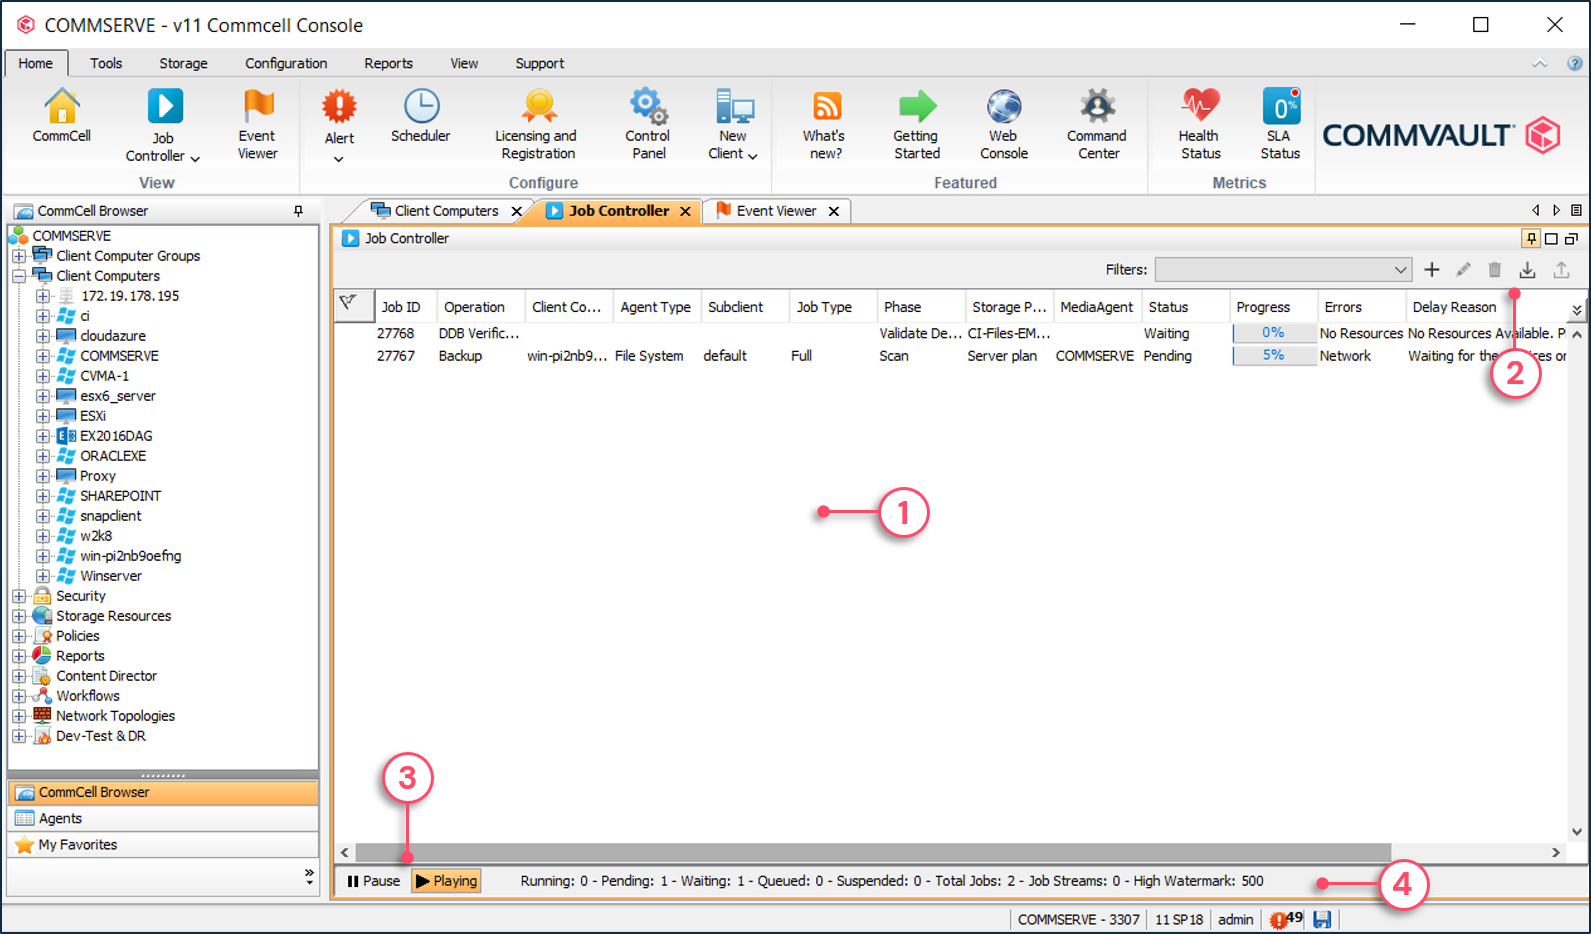
The Job Controller
1 - Currently active jobs and job status are displayed in the Job Controller.
2 - Add or apply Job Controller filters if needed.
3 - Pause & Play buttons are used
to freeze and unfreeze the Job Controller window refresh. It does not pause the actual jobs.
4 - CommCell® summary data for all active jobs and streams.
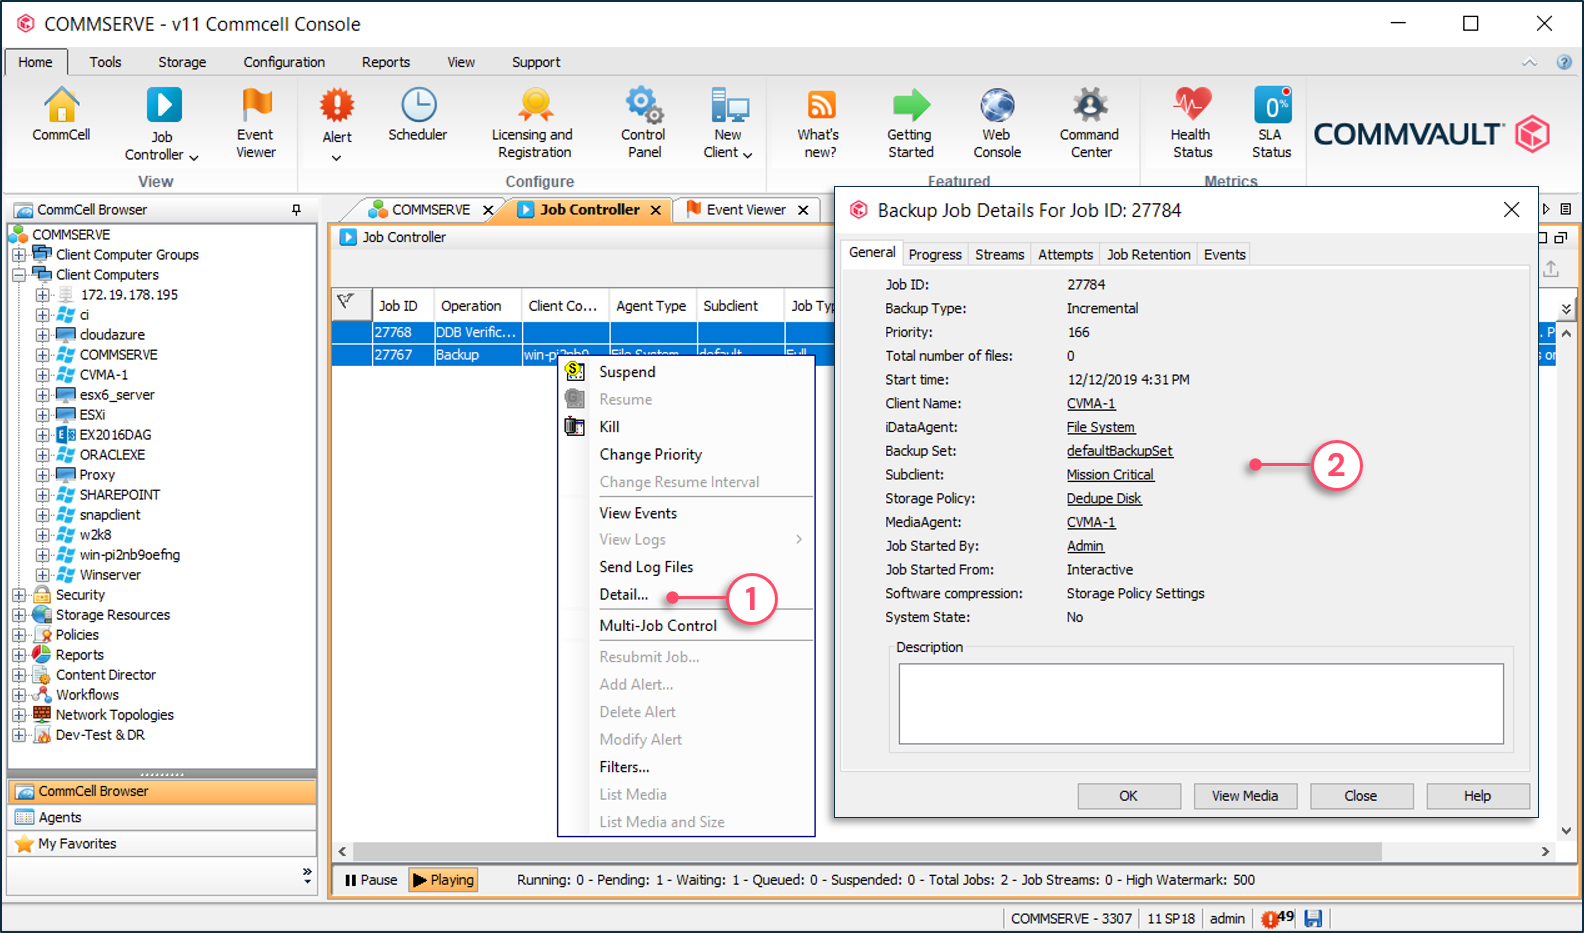
To view job details
1 - Right-click on job and select Detail or double-click on job.
2 - Details for job can be viewed including general information, progress, streams and media usage.
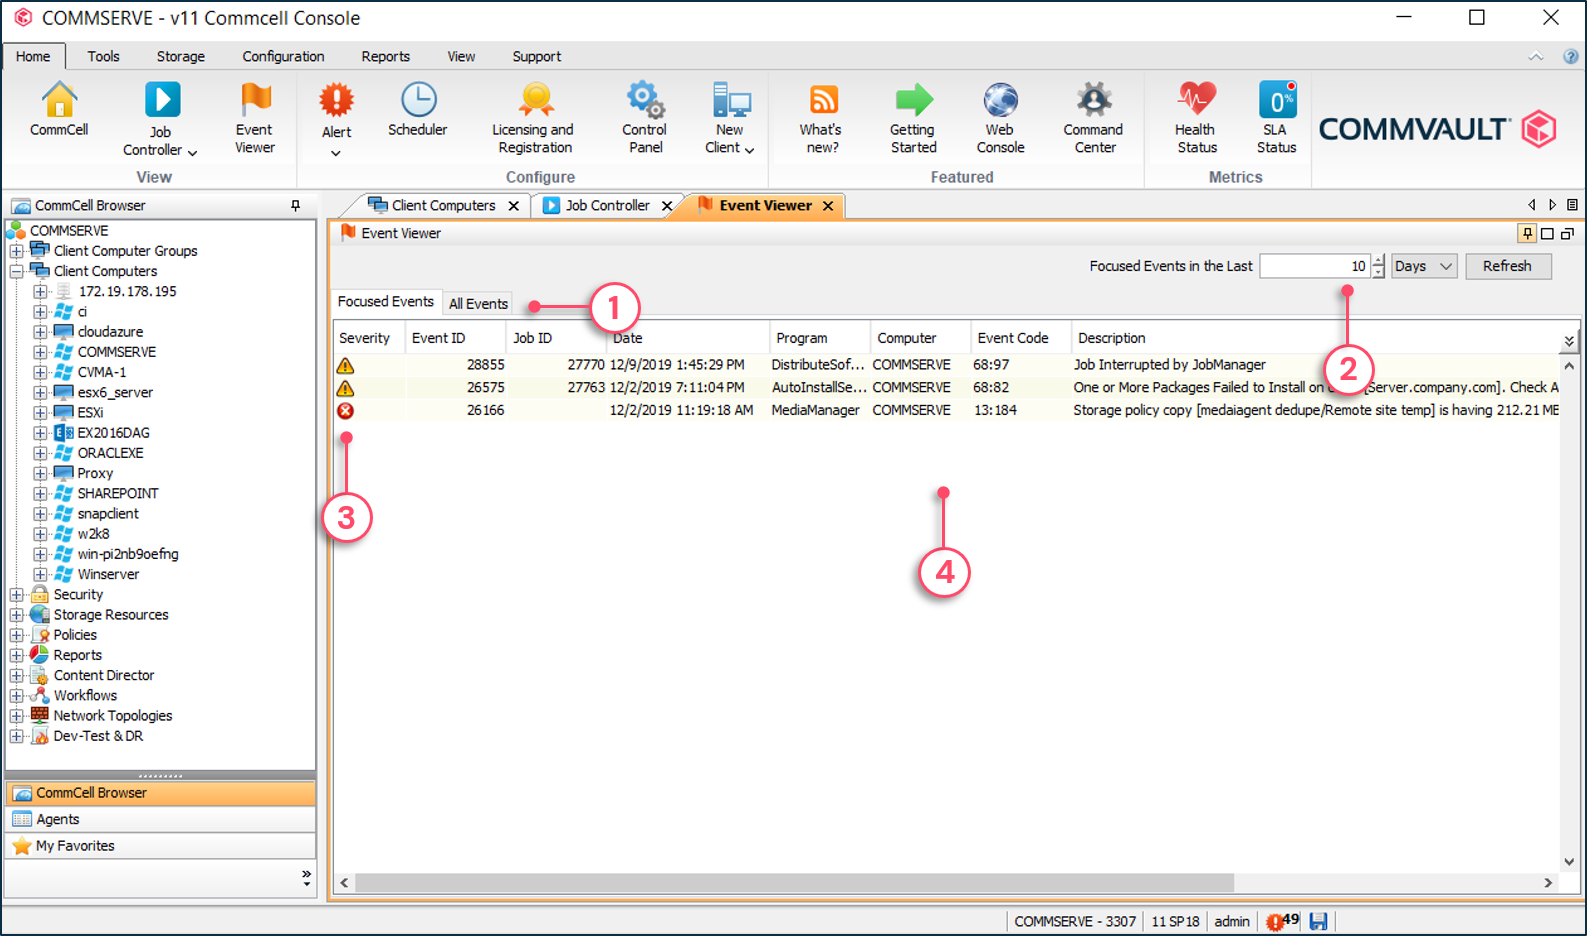
The Event Viewer
1 - Click to see all events or focused events.
2 - Set a time range for the Focused Events tab.
3 - Job severity icons allows to quickly gauge events.
4 - Event details are displayed.
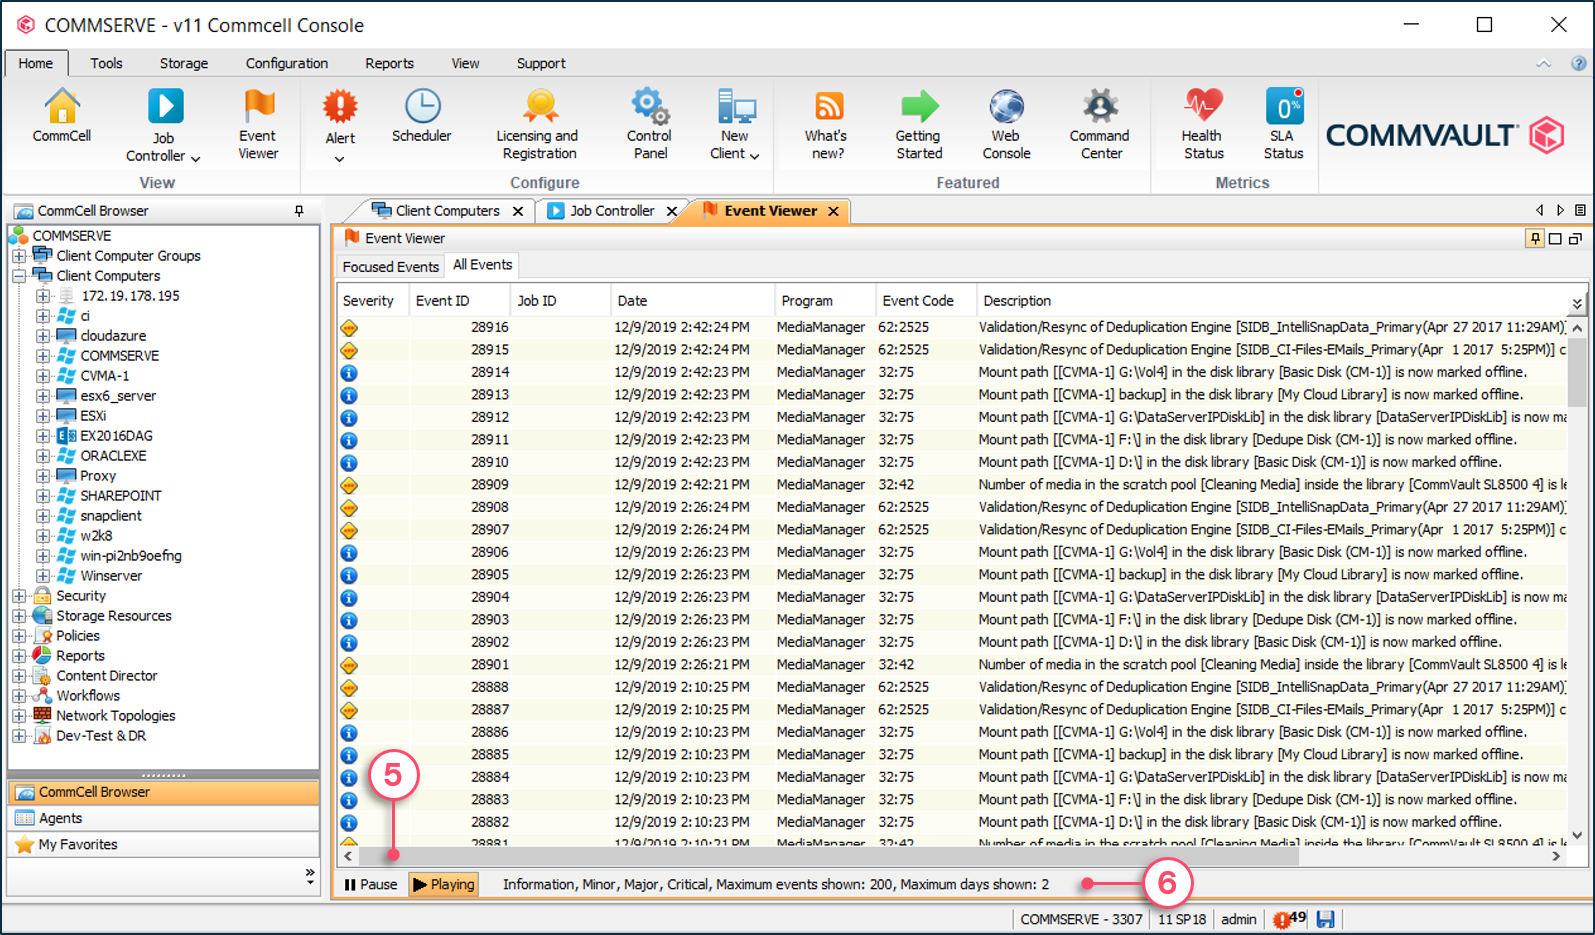
5 - Pause & Play buttons to freeze and unfreeze Event Viewer window refresh.
6 - Maximum number of events that will be displayed.
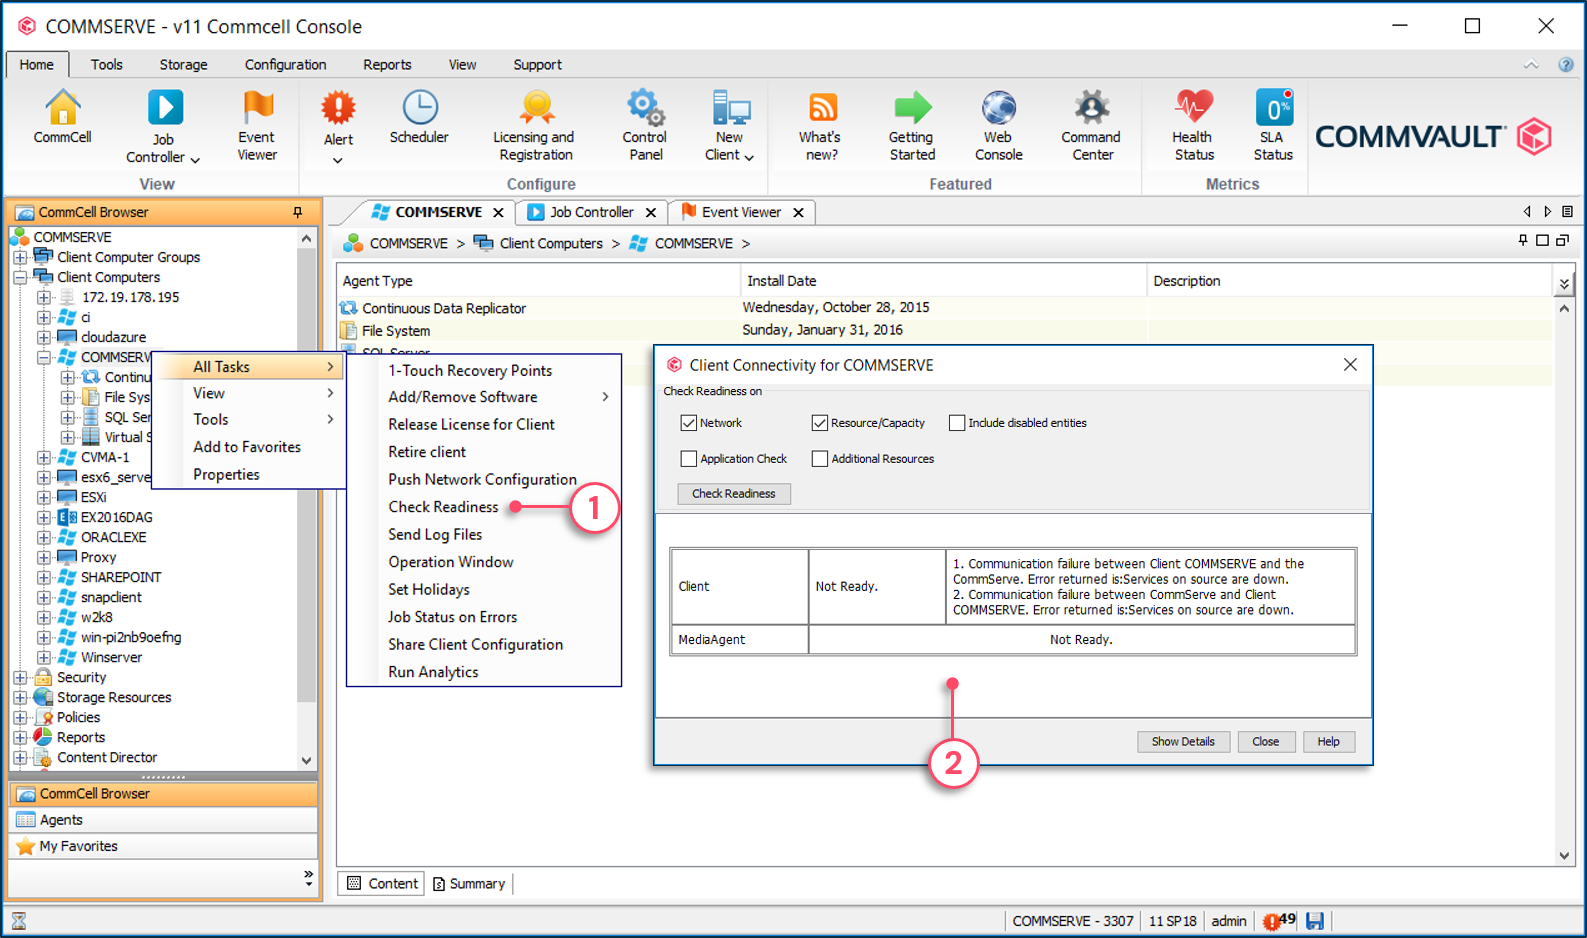
To check a client readiness
1 - Right-click the client | All Tasks | Check Readiness.
2 - The Check Readiness will verify connectivity to the Client and all MediaAgents defined as data paths within the Client as well as backup resources.
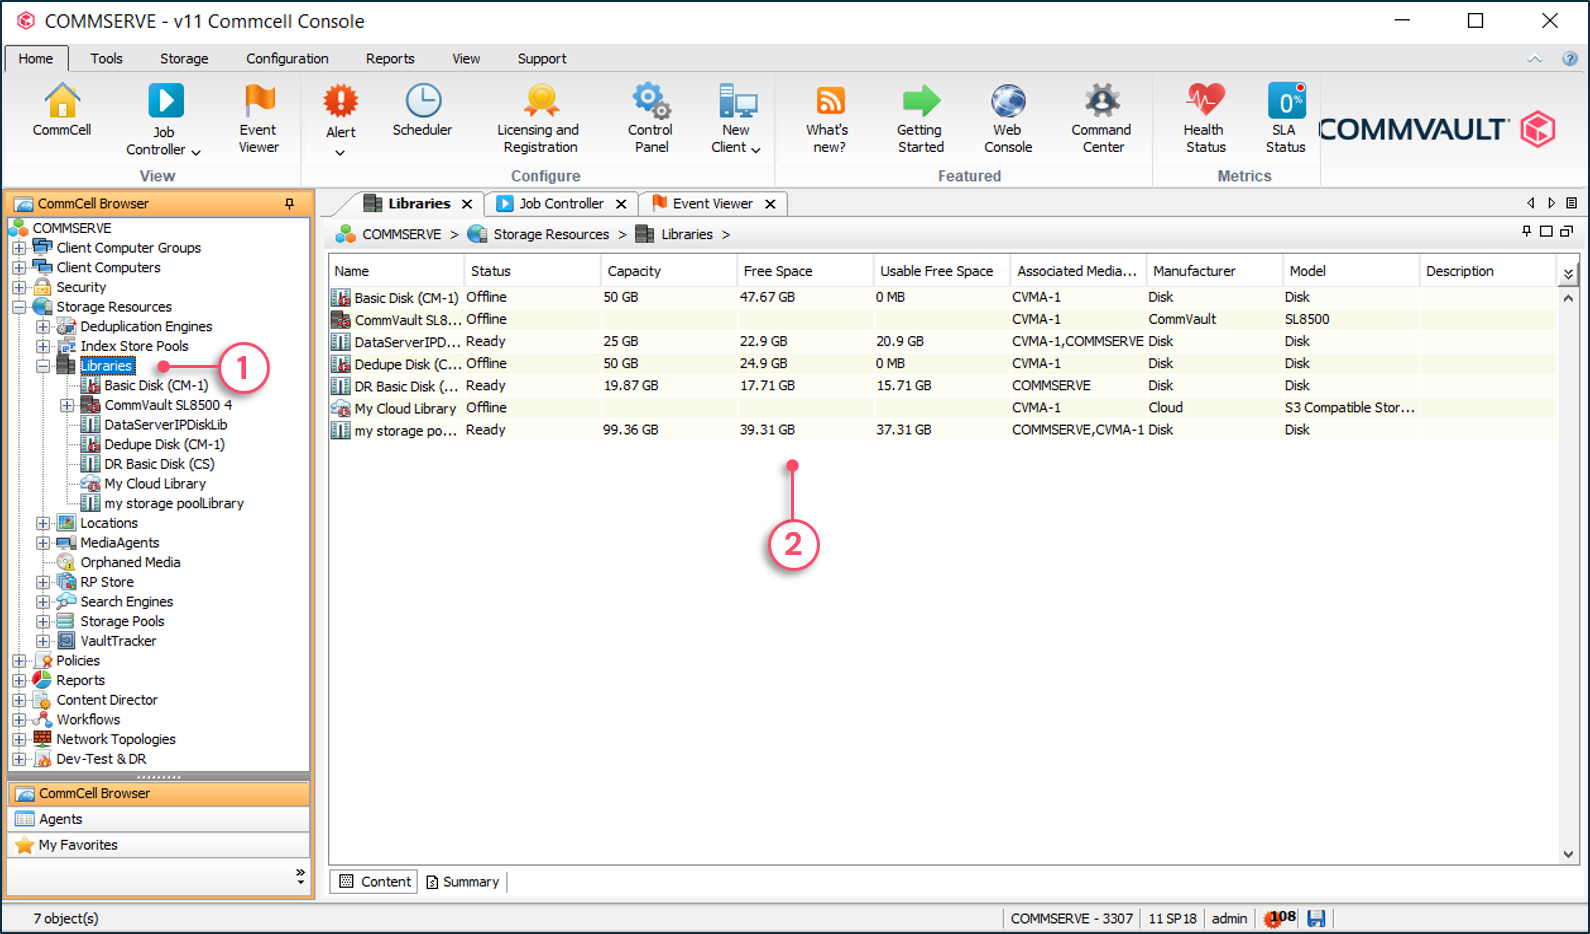
To view storage resource status
1 - Expand Storage Resources | click Libraries to expand container.
2 - Displays the status of all libraries.
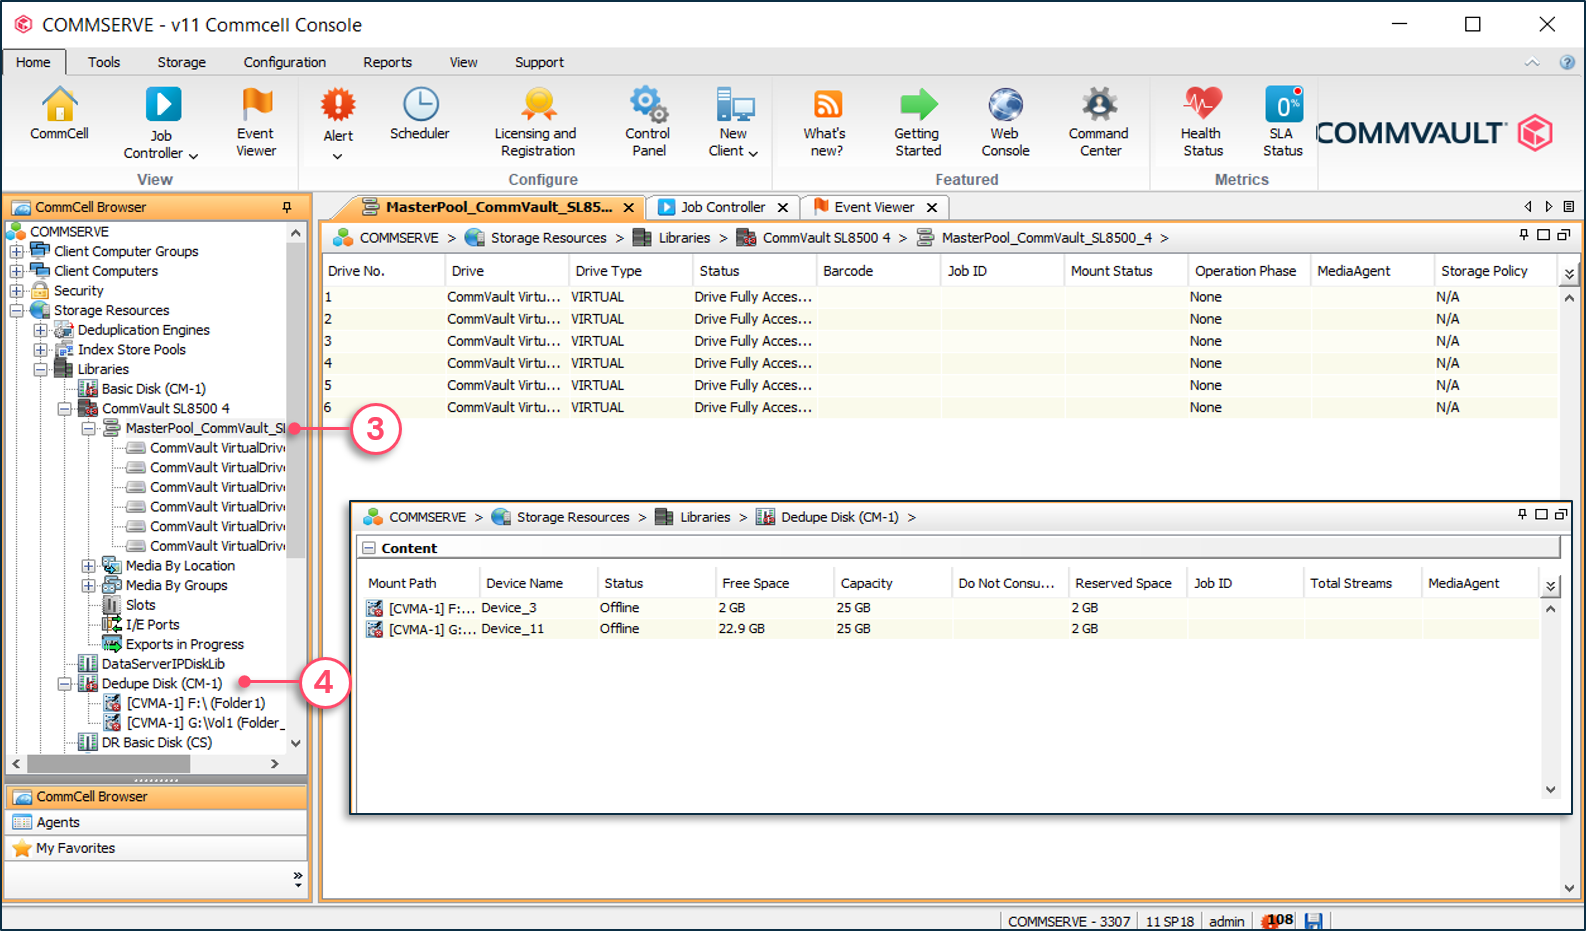
3 - Clicking a tape library MasterPool displays the status of all tape drives.
4 - Clicking a disk library displays the status of all its mount paths.
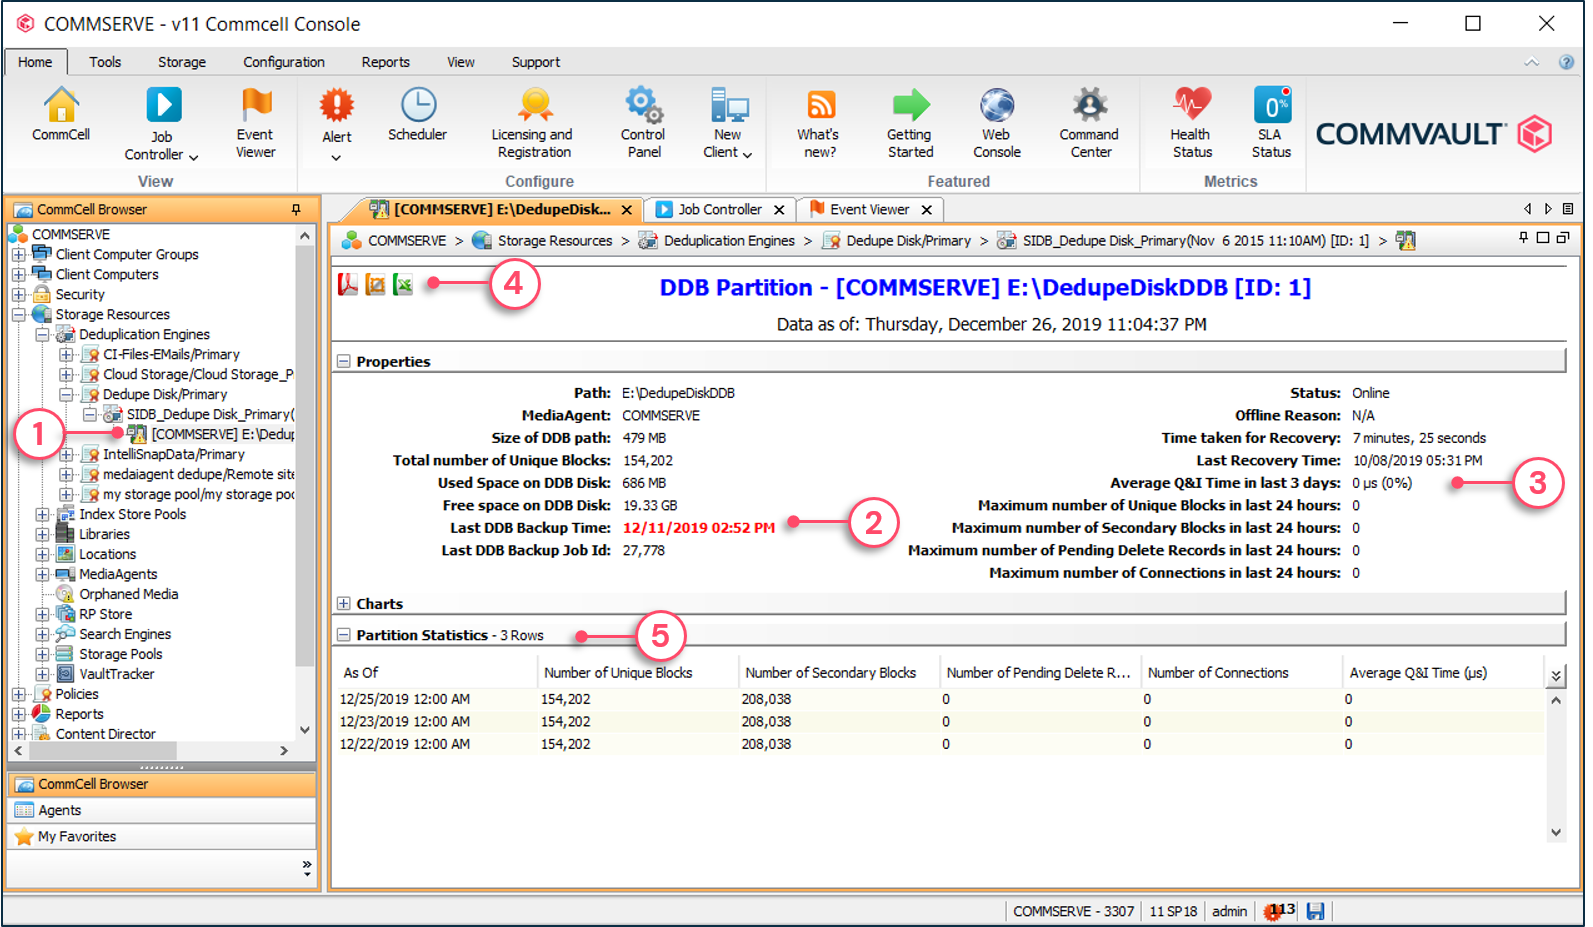
To validate deduplication database performances
1 - Expand Storage Resources | Deduplication Engines | Select and expand a Deduplication policy | Expand the DDB display and click on a ddb partition.
2 - The Properties section displays information about the DDB partition including information on the last DDB backup time.
3 - Displays the response time of the database for queries and inserts.
4 - Click to export DDB partition information. Details can be exported to PDF, XLS and MHTML formats.
5 - Additional information of the deduplication partition including graphs and statistics can be viewed in the details pane.
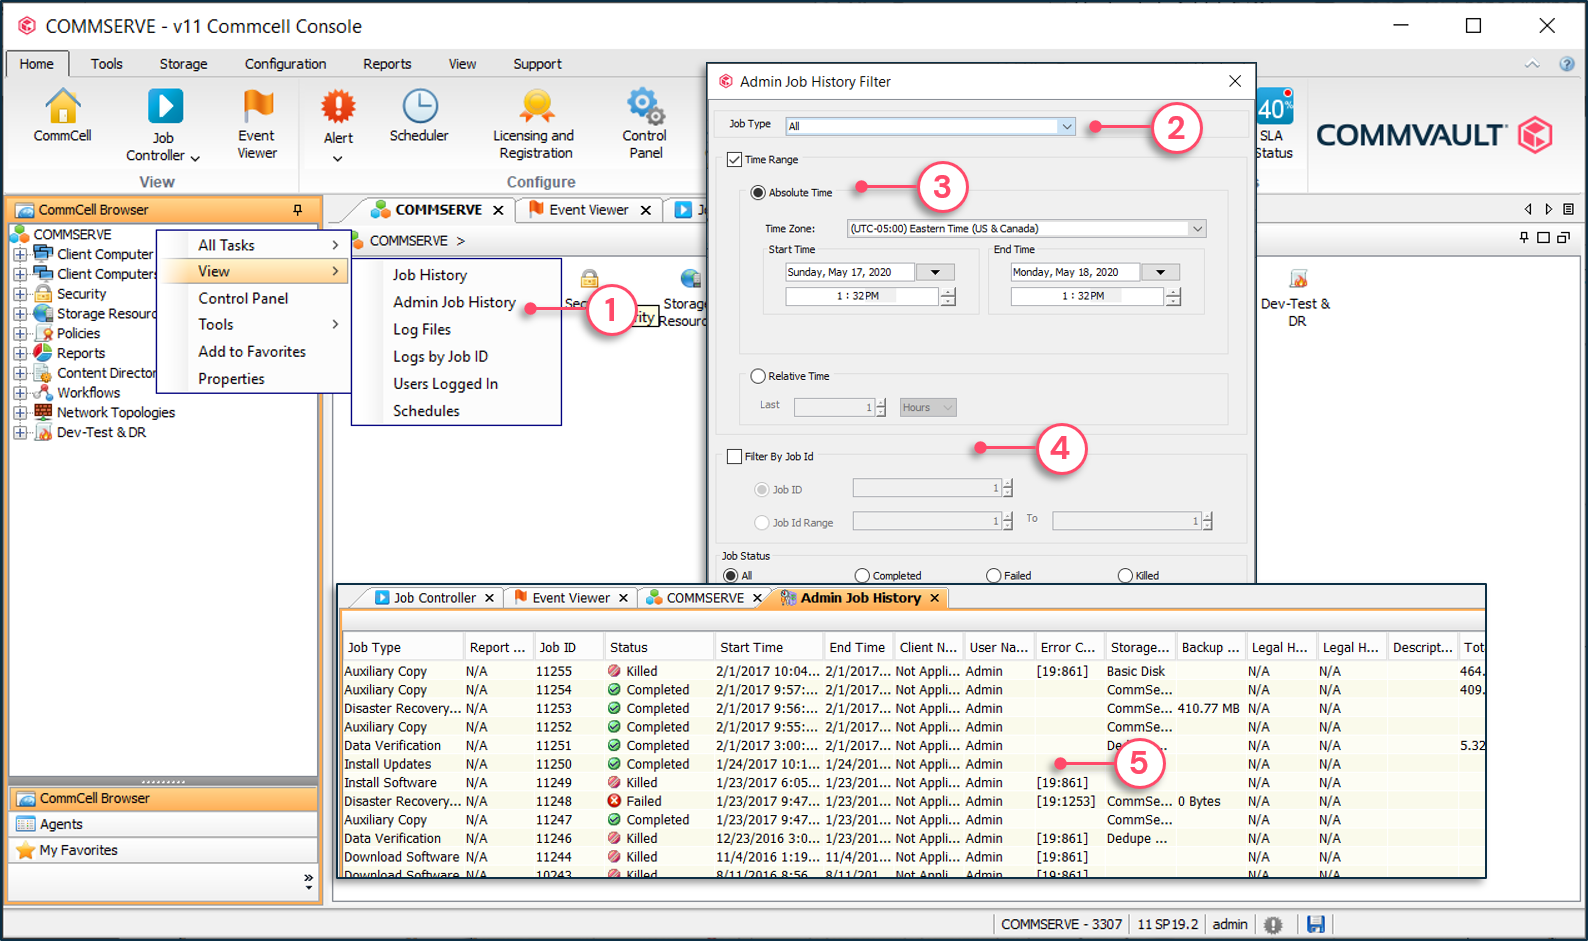
To view administrative job history
1 - Right-click the CommServe® server | View | Admin Job History.
2 - Choose the job type.
3 - Choose the time range.
4 - Choose any additional required filters.
5 - Jobs are displayed and can be double-clicked to get detailed information.
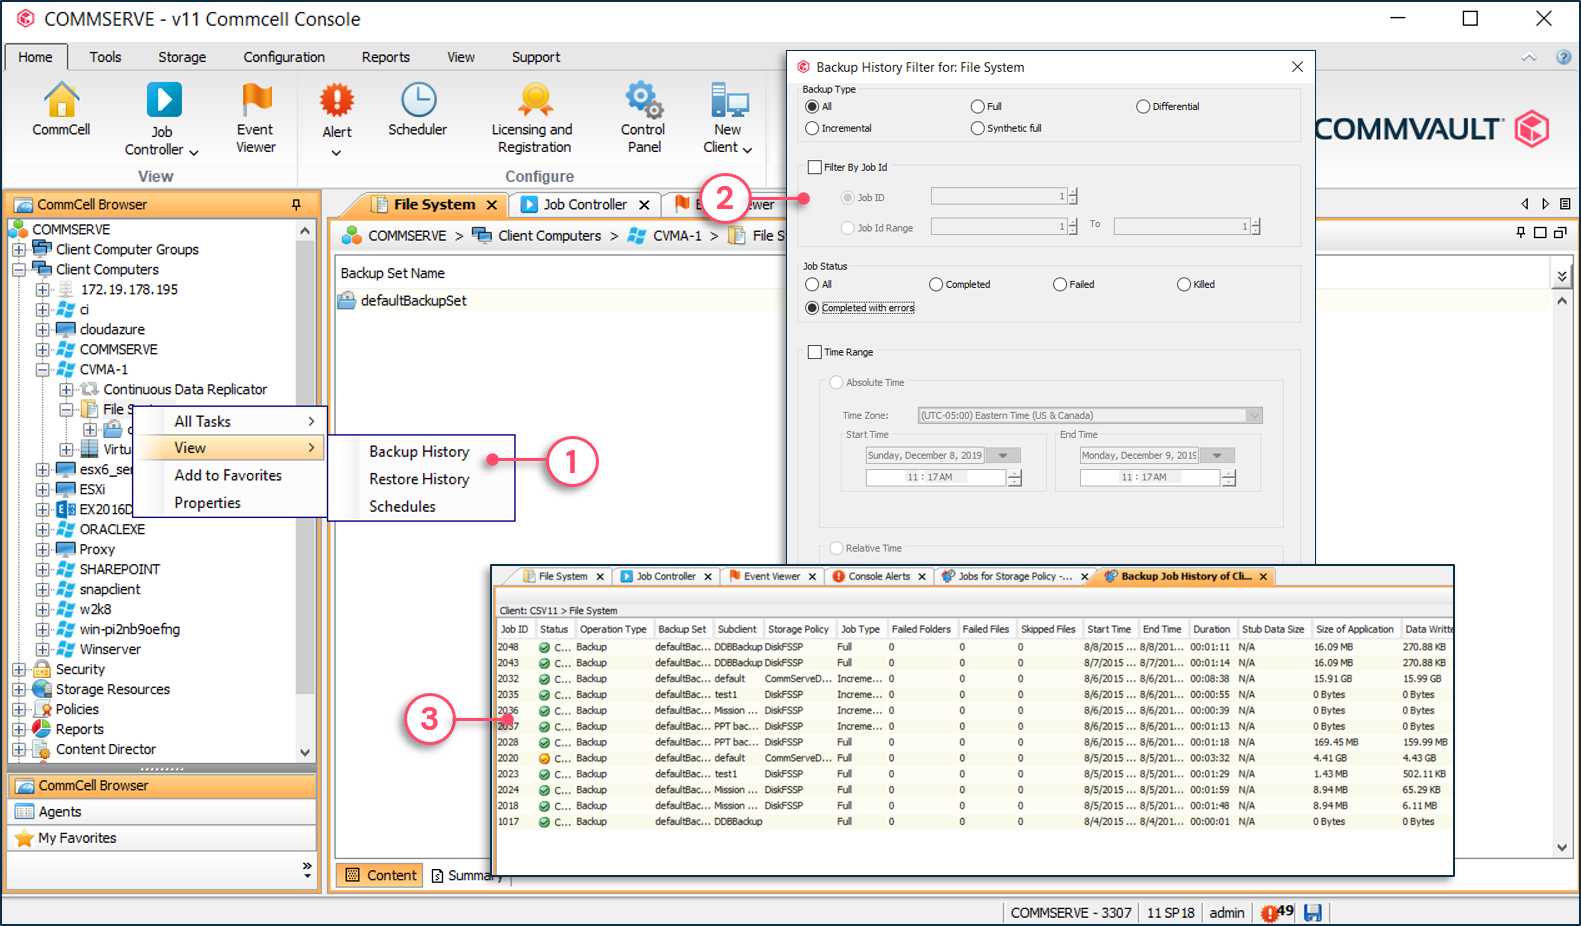
To view Job History
1 - Right-click Client, Agent of Data Set | View | Backup or Restore History.
2 - Select viewing filter criteria.
3 - Job history will be displayed in the details window.

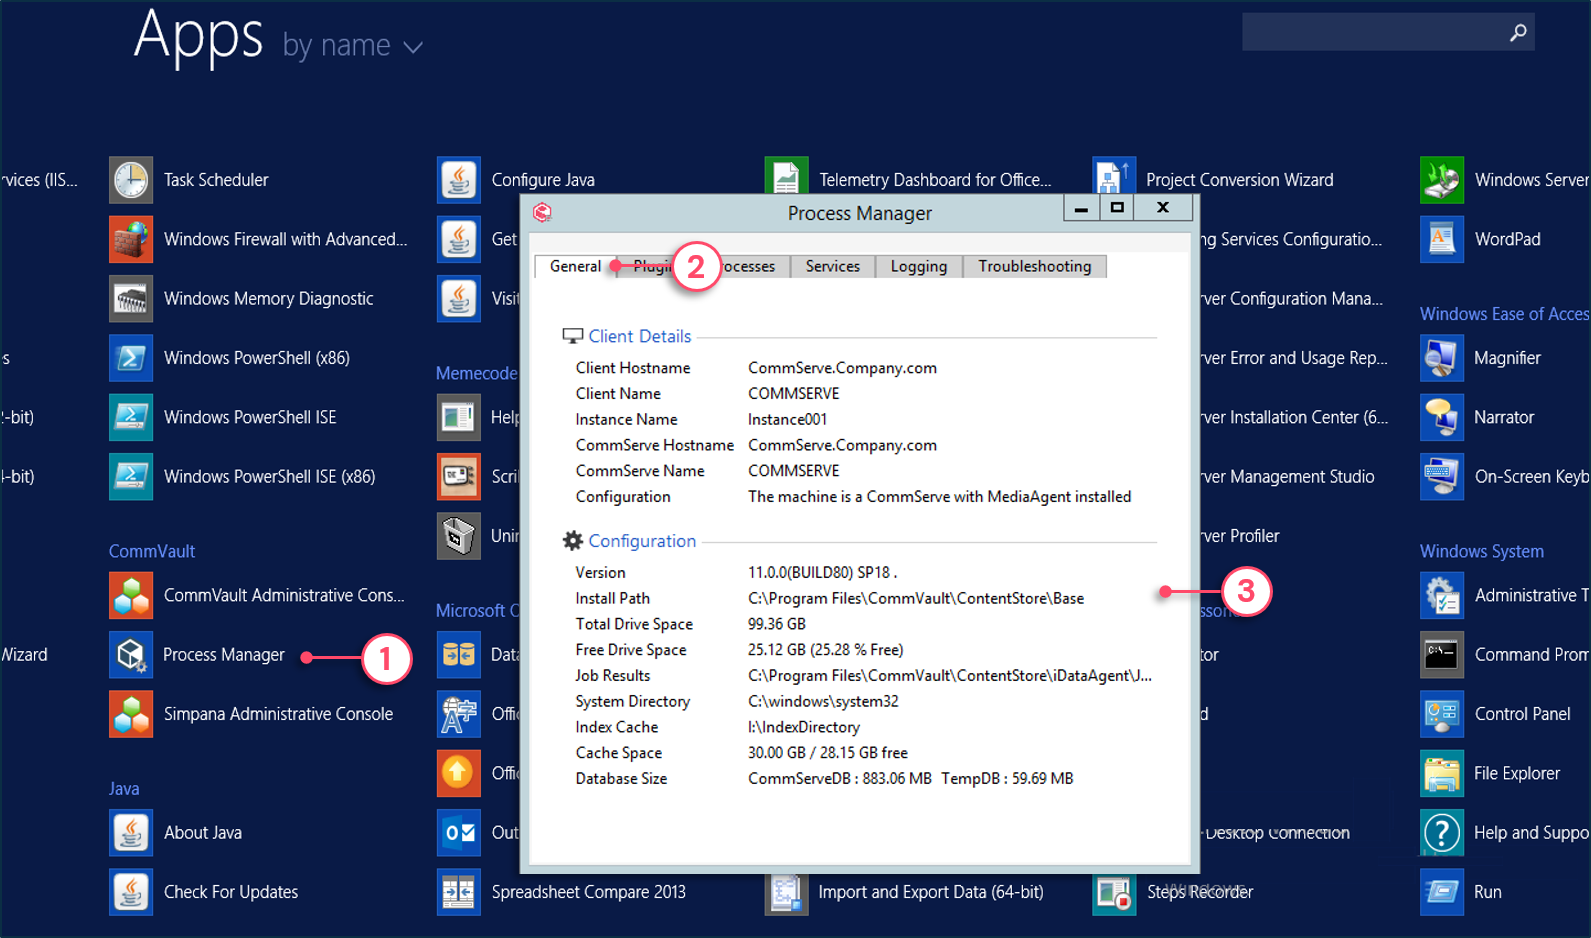
The Process Manager General tab
1 - From the Apps tiles window | Click Process Manager.
2 - Click the General tab.
3 - Provides information about the Commvault® software installed on the system.
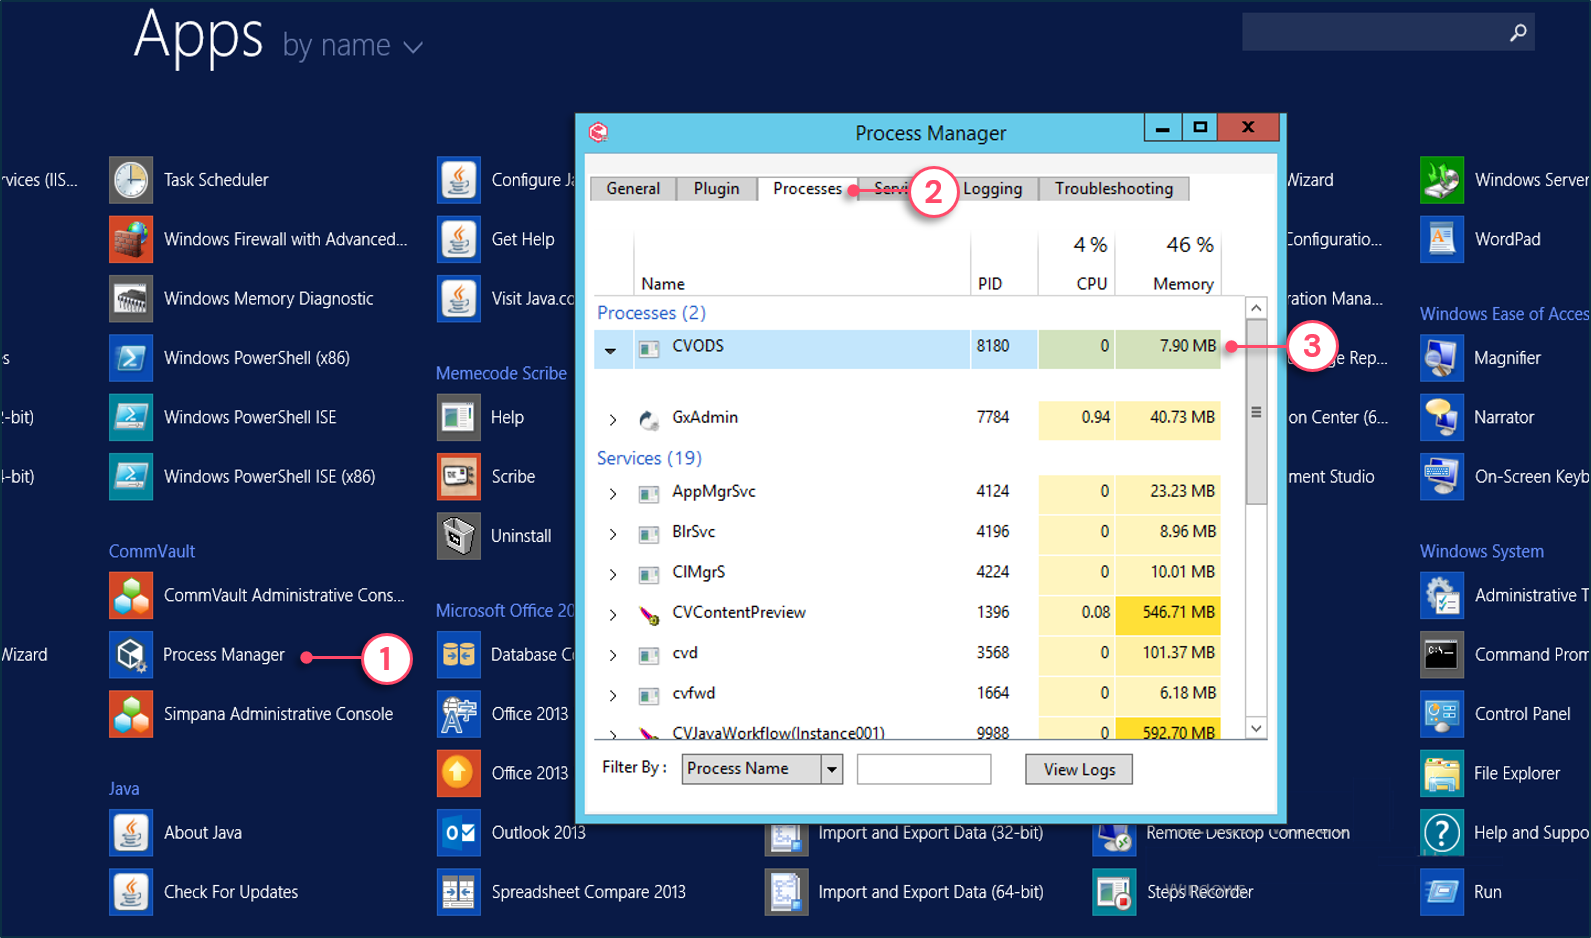
The Process Manager Processes tab
1 - From the Apps tiles window | Click Process Manager.
2 - Click the Processes tab.
3 - Provides CPU and memory usage information for each Commvault® related processes.
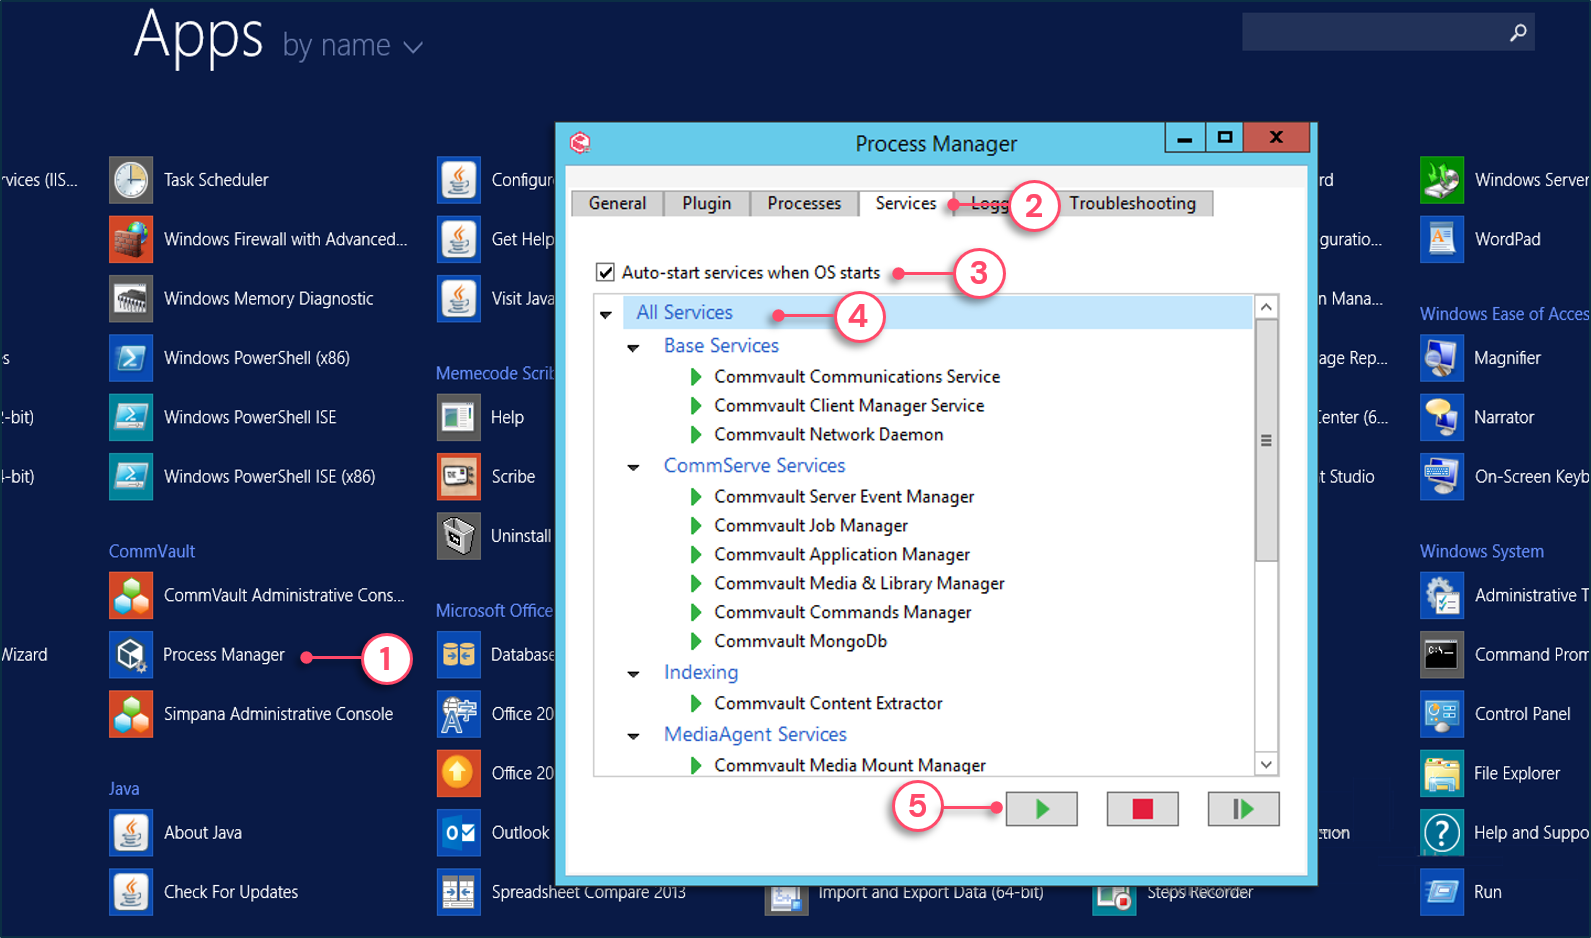
The Process Manager Services
1 - From the Apps tiles window | Click Process Manager.
2 - Click the Services tab.
3 - Check to start services automatically on OS startup.
4 - Click All Services to control all services or click a section to control the services under the section name.
5 - Click Start, Stop or Recycle.
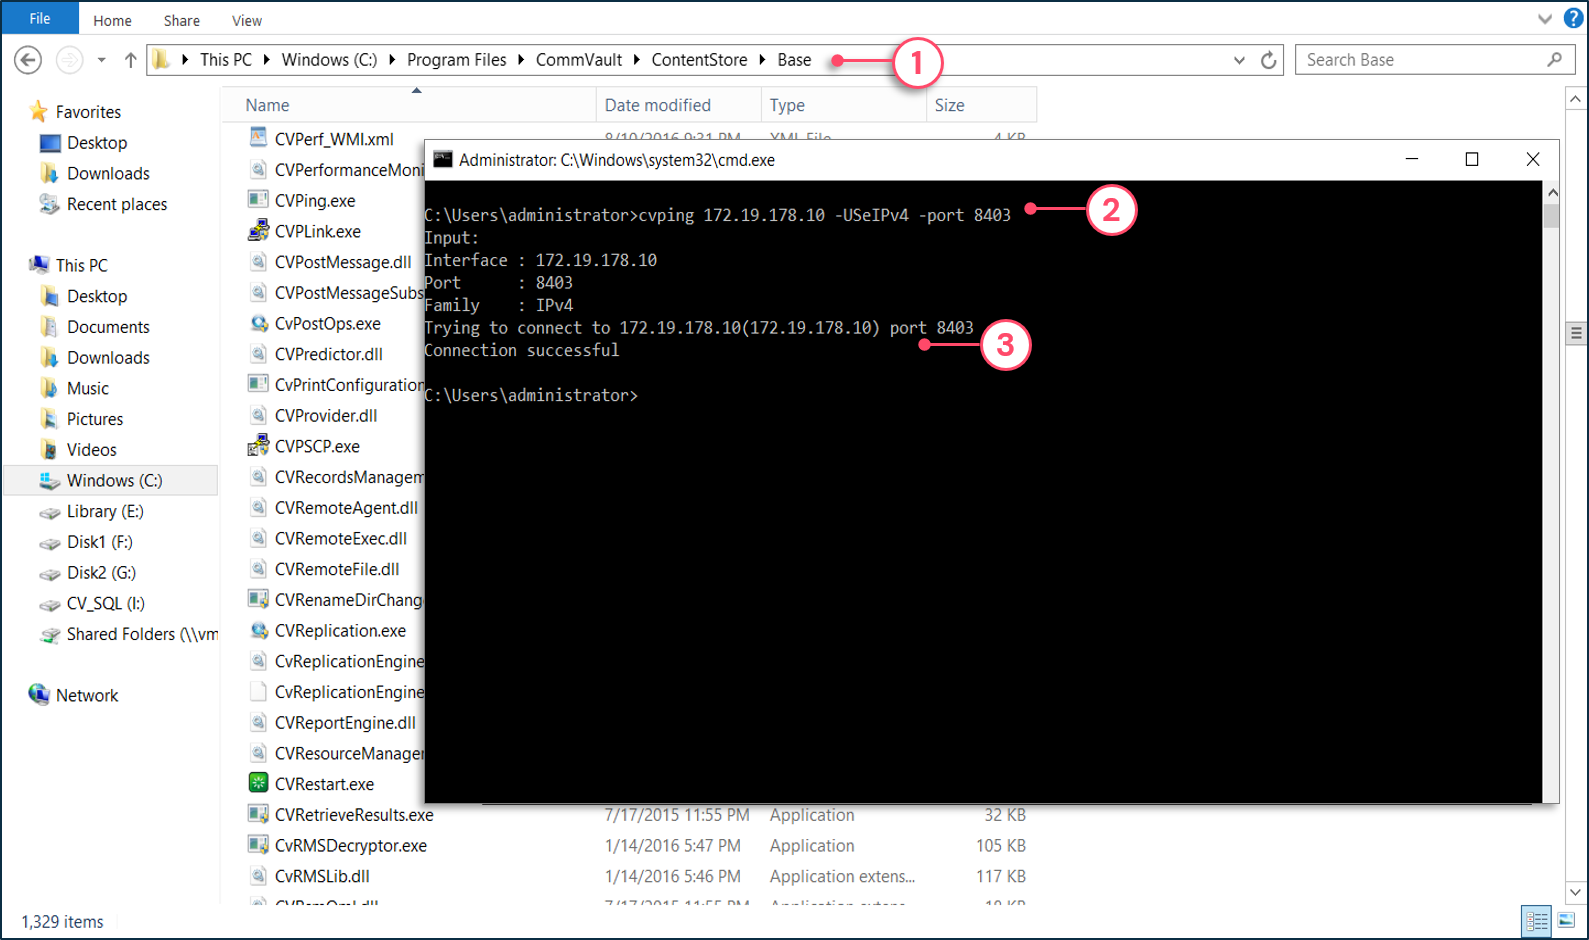
To use CVPing
1 - In a command prompt, navigate to the Base folder.
2 - Type the CVPing command.
3 - The result displays if connection was successful or failed.
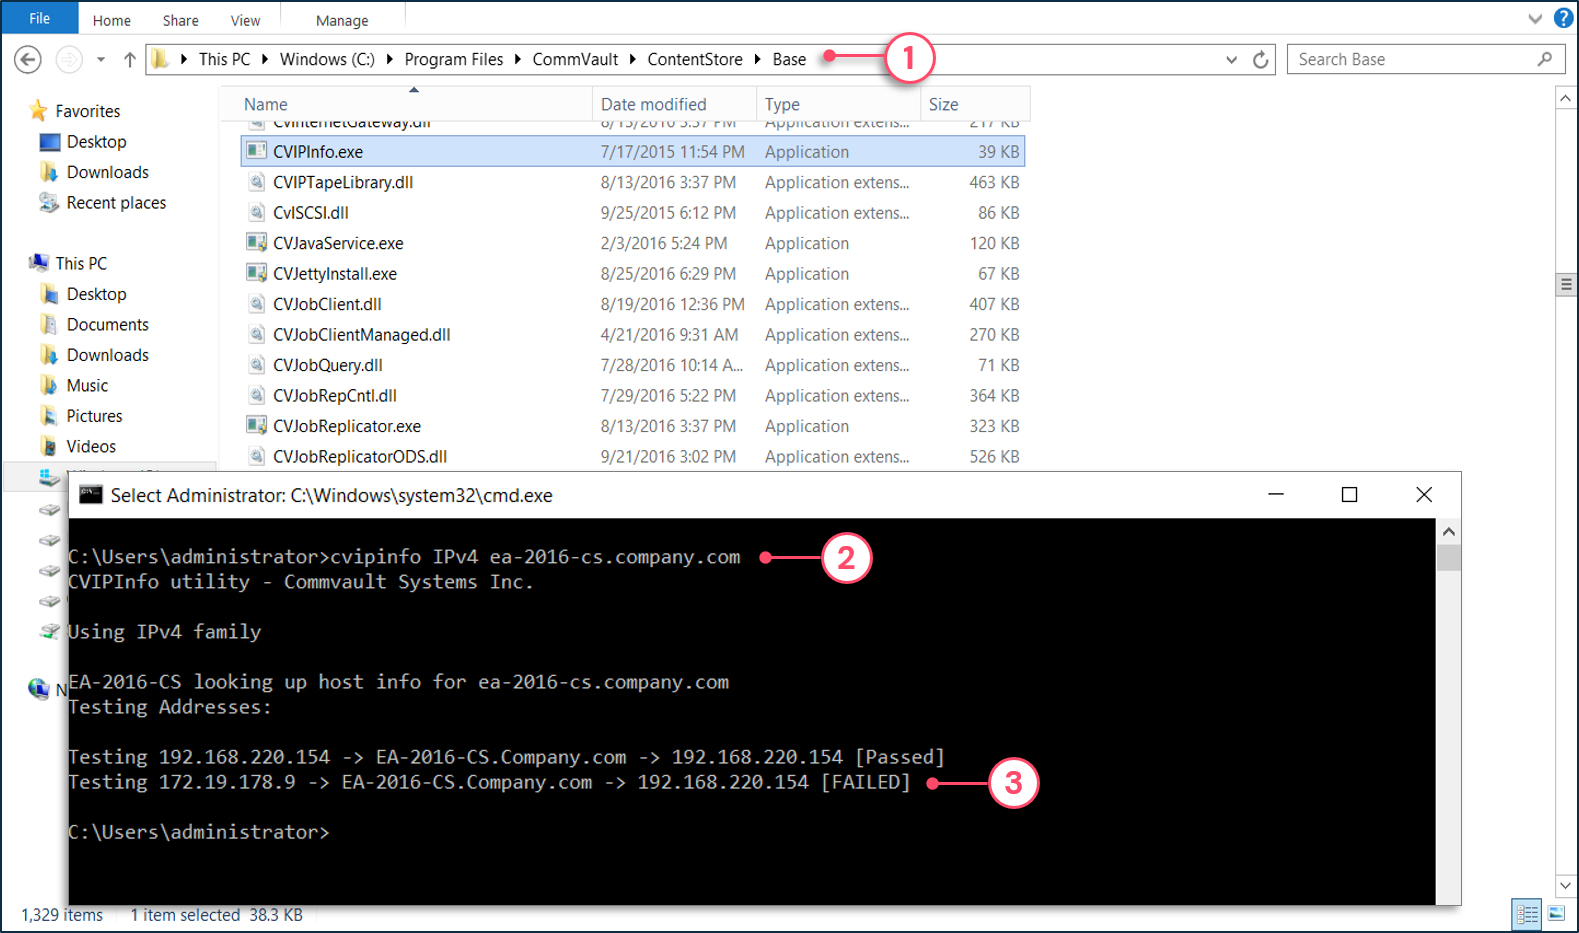
To use CVIPInfo
1 - In a command prompt, navigate to the Base folder.
2 - Type the CVIPInfo command.
3 - The result displays if forward and reverse DNS resolution was successful or failed.
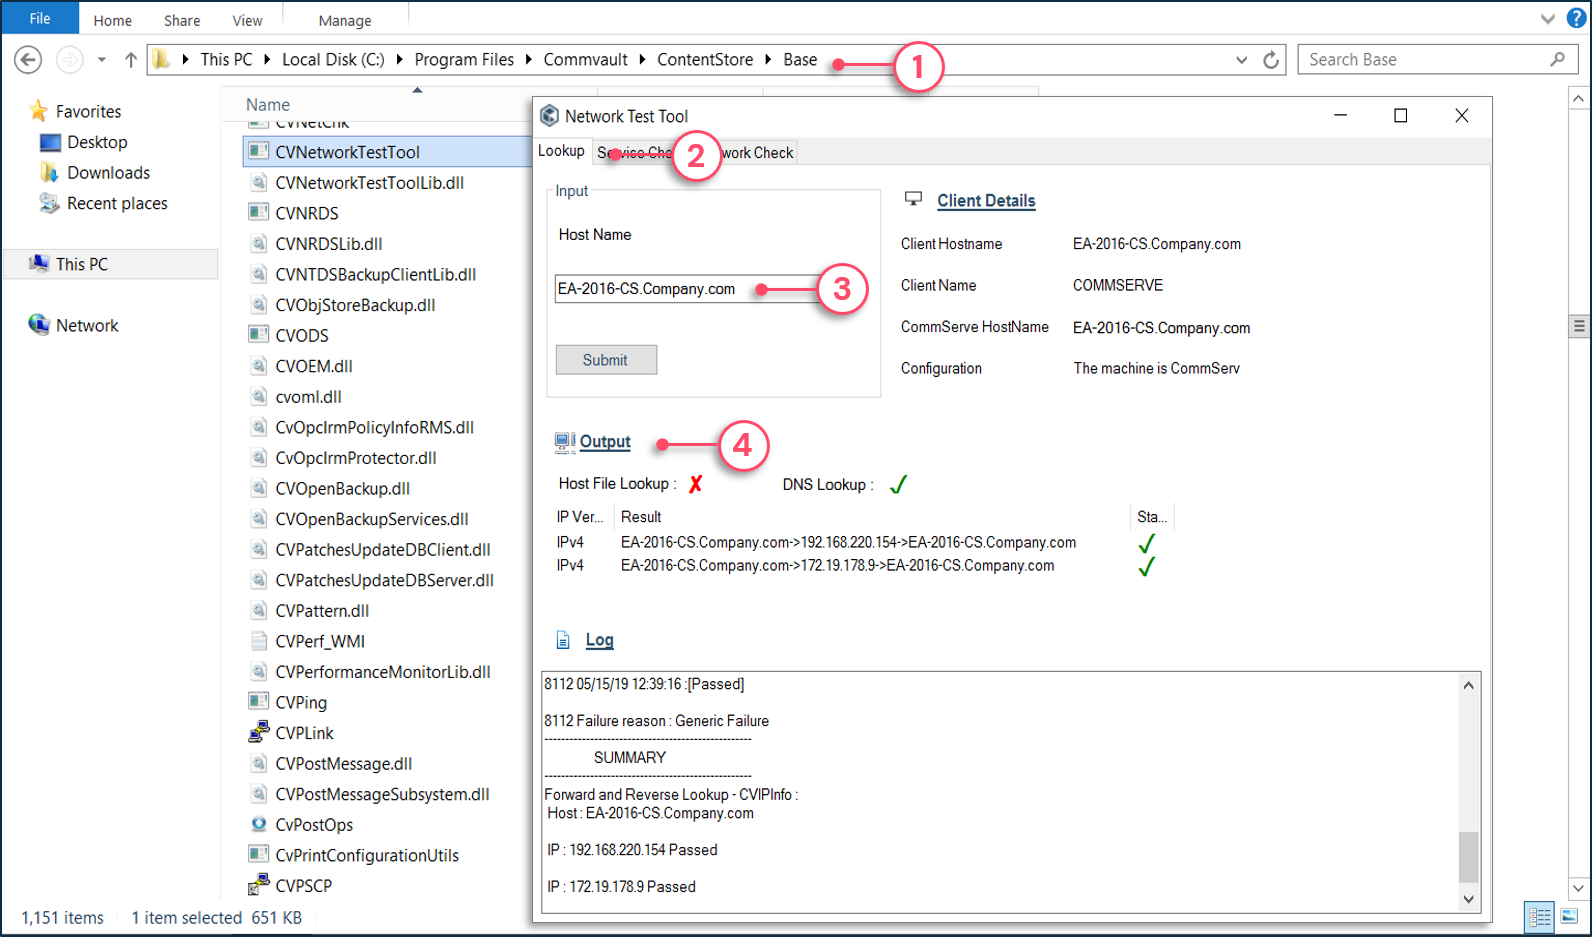
CVNetworkTestTool in host name lookup mode
1 - In a command prompt, navigate to the Base folder.
2 - Choose the Lookup tab.
3 - Provide the client name.
4 - Displays the status of the lookup and the log entries for the command.
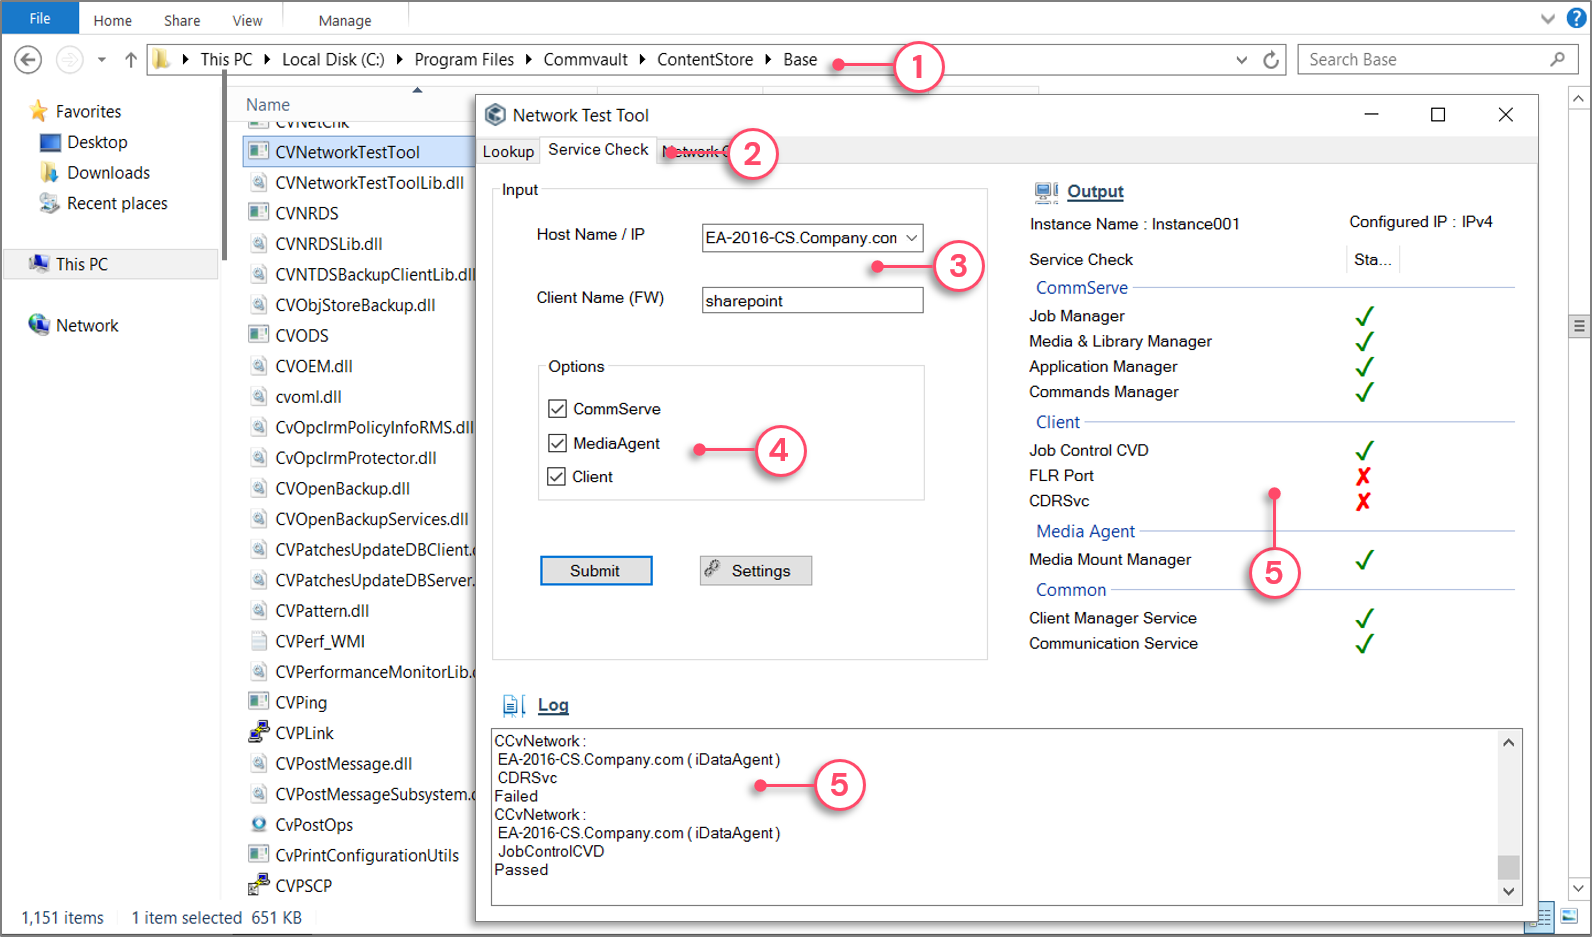
CVNetworkTestTool in service check mode
1 - In a command prompt, navigate to the Base folder.
2 - Choose the Service Check tab.
3 - Provide the hostname and client name.
4 - Choose the roles installed on the machine.
5 - Displays the status of the service check and the log entries for the command.
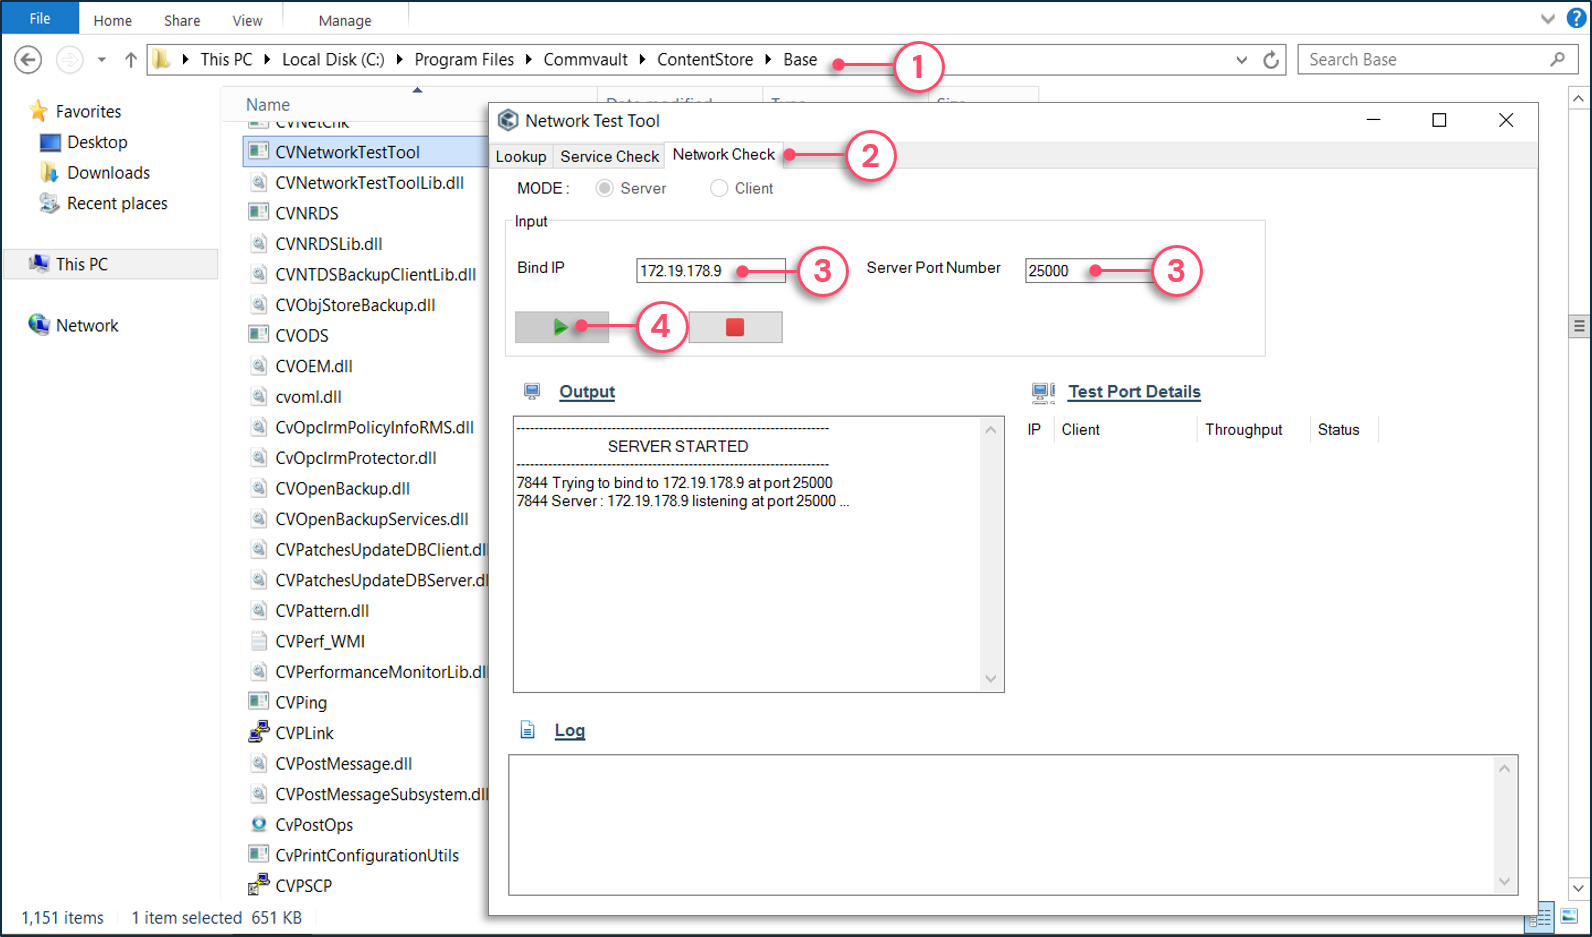
CVNetworkTestTool in network check Server mode
1 - On the target server, navigate to the Base folder and execute CVNetworkTestTool.exe.
2 - Choose the Network Check tab and select Server.
3 - Provide the IP address and a port to which the listener will be bound.
4 - Click the play button to start the listener.
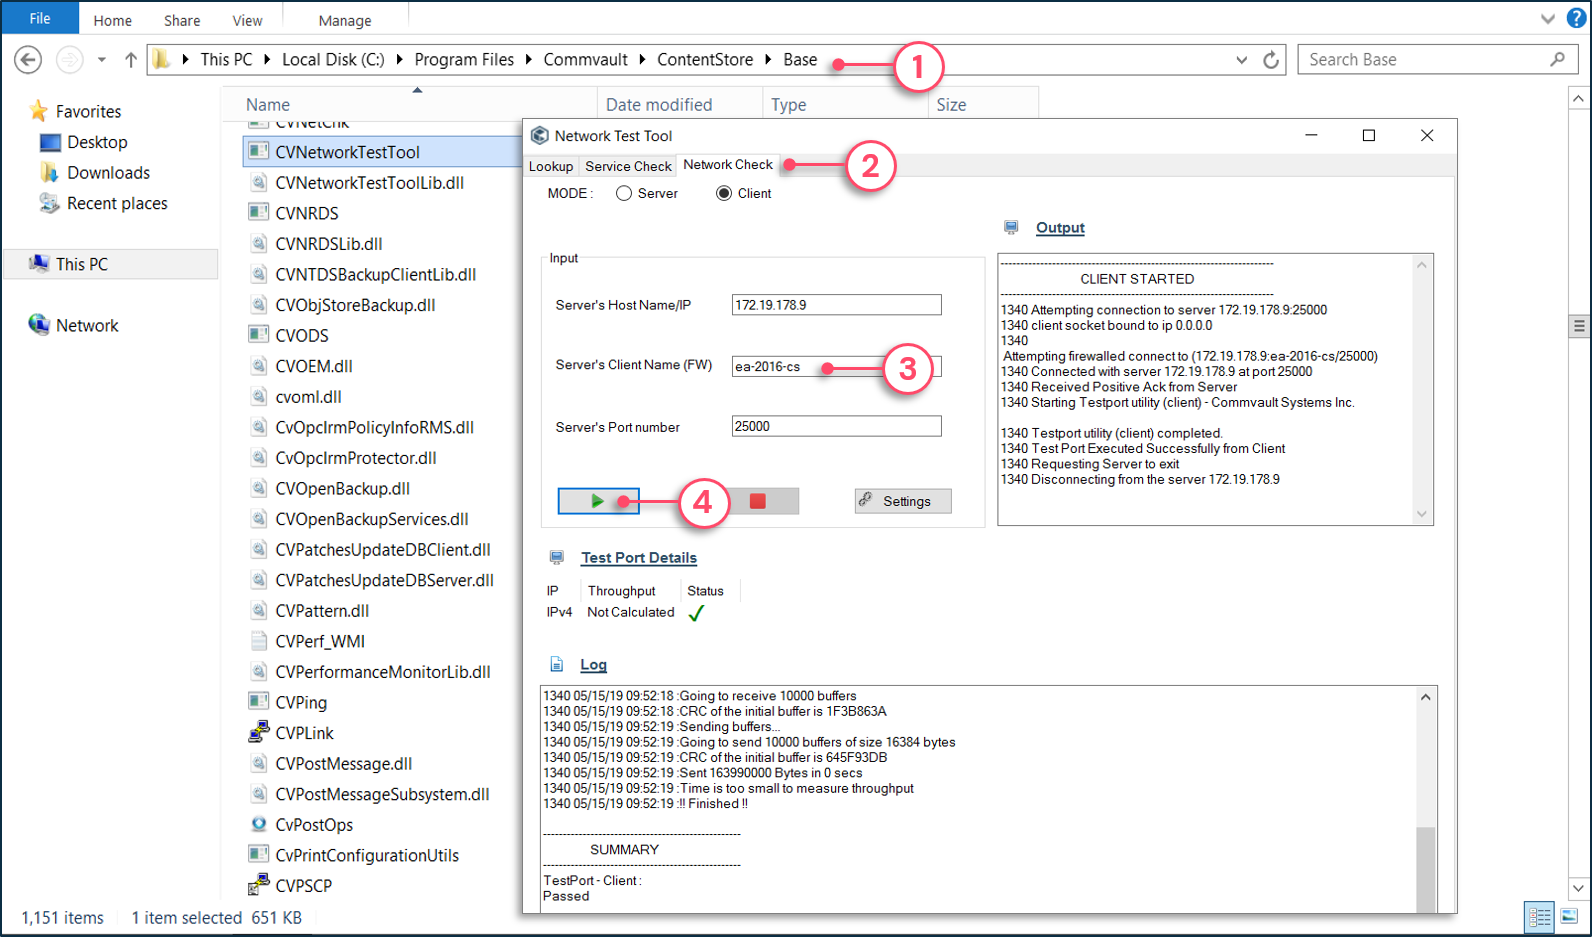
To run a CVNetworkTestTool Network Check
1 - On the target server, navigate to the Base folder and execute CVNetworkTestTool.exe.
2 - Choose the Network Check tab and select Server.
3 - Provide the IP address and a port to which the listener will be bound.
4 - Click the play button to start the listener.
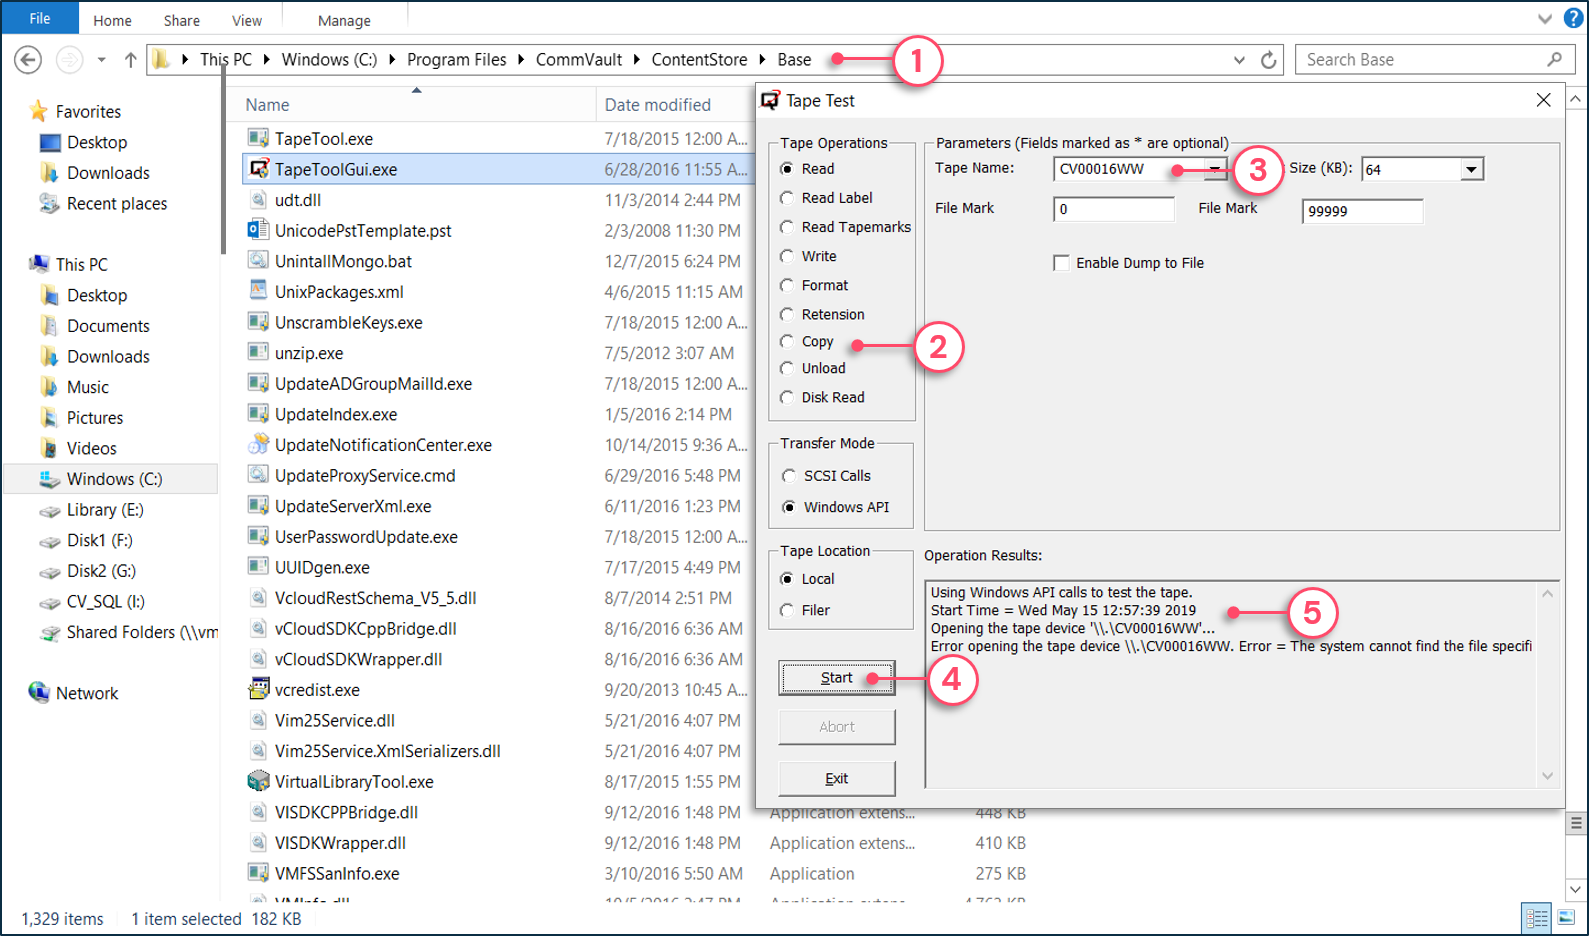
To use TapeToolGUI
1 - Navigate to the Base folder and execute TapeToolGUI.exe.
2 - Select the desired task to execute.
3 - Set the task options, such as the tape name.
4 - Click Start to execute the task.
5 - The detailed result is displayed.
Copyright © 2021 Commvault | All Rights Reserved.