Commvault
Log Files
Quick Links to Topics:
Credits:
Great thanks to Mike Byrne for his hard work with the screen captures!
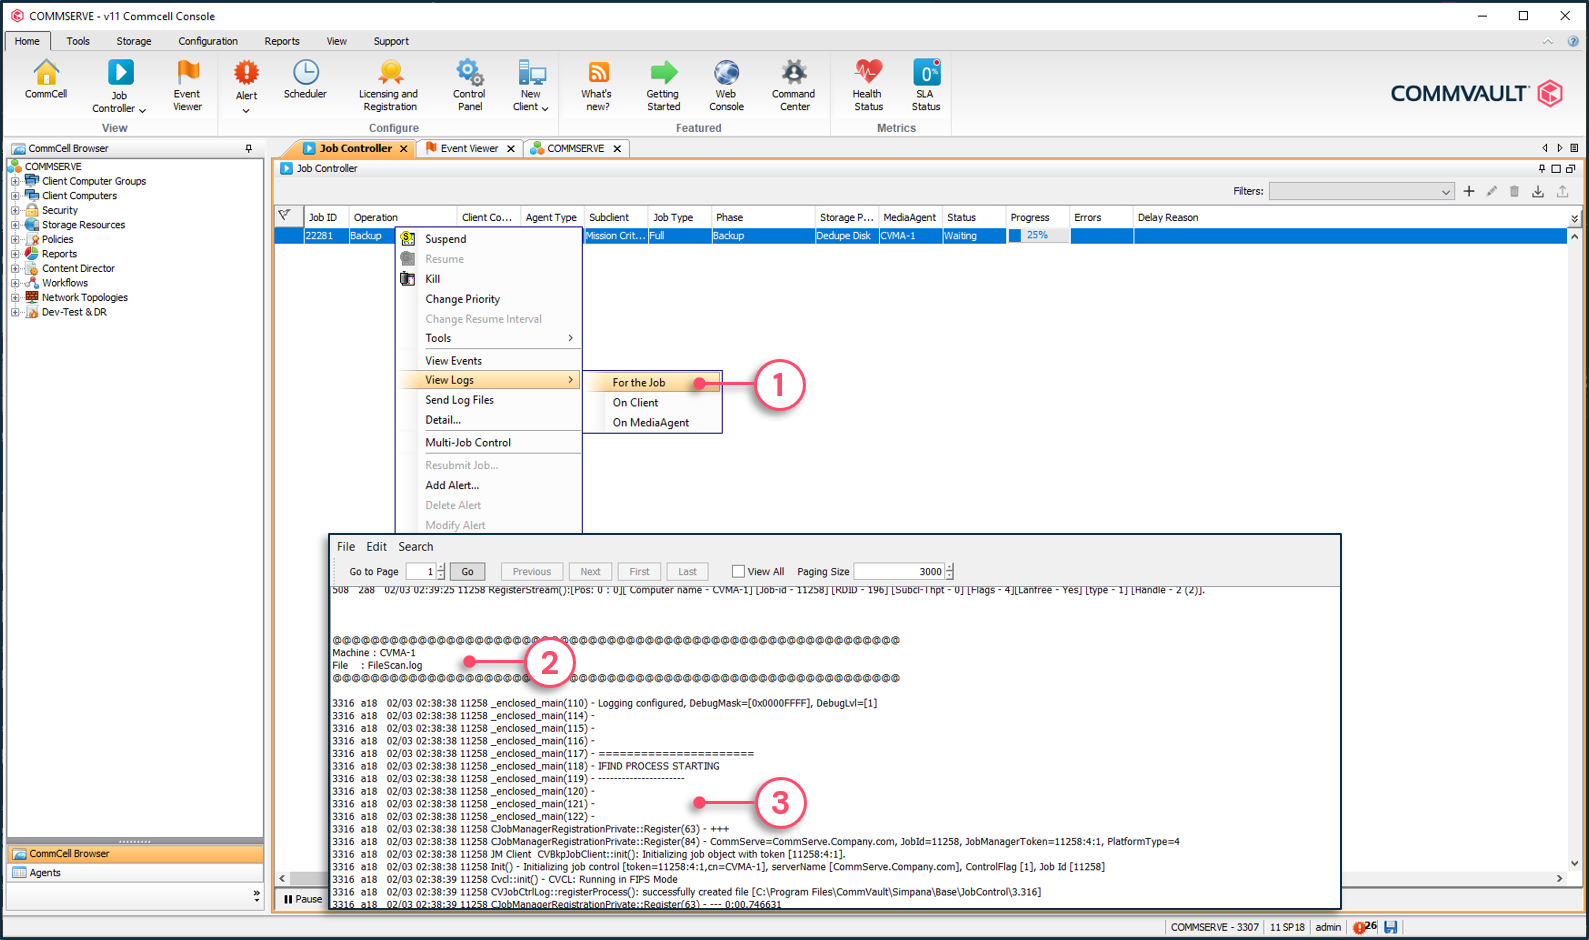
To view the log files of a job
1 - Right-click the job | View Logs | Select the logs to view.
2 - Specifies from which server and log files entries are extracted.
3 - Displays the extracted entries relevant to the job.
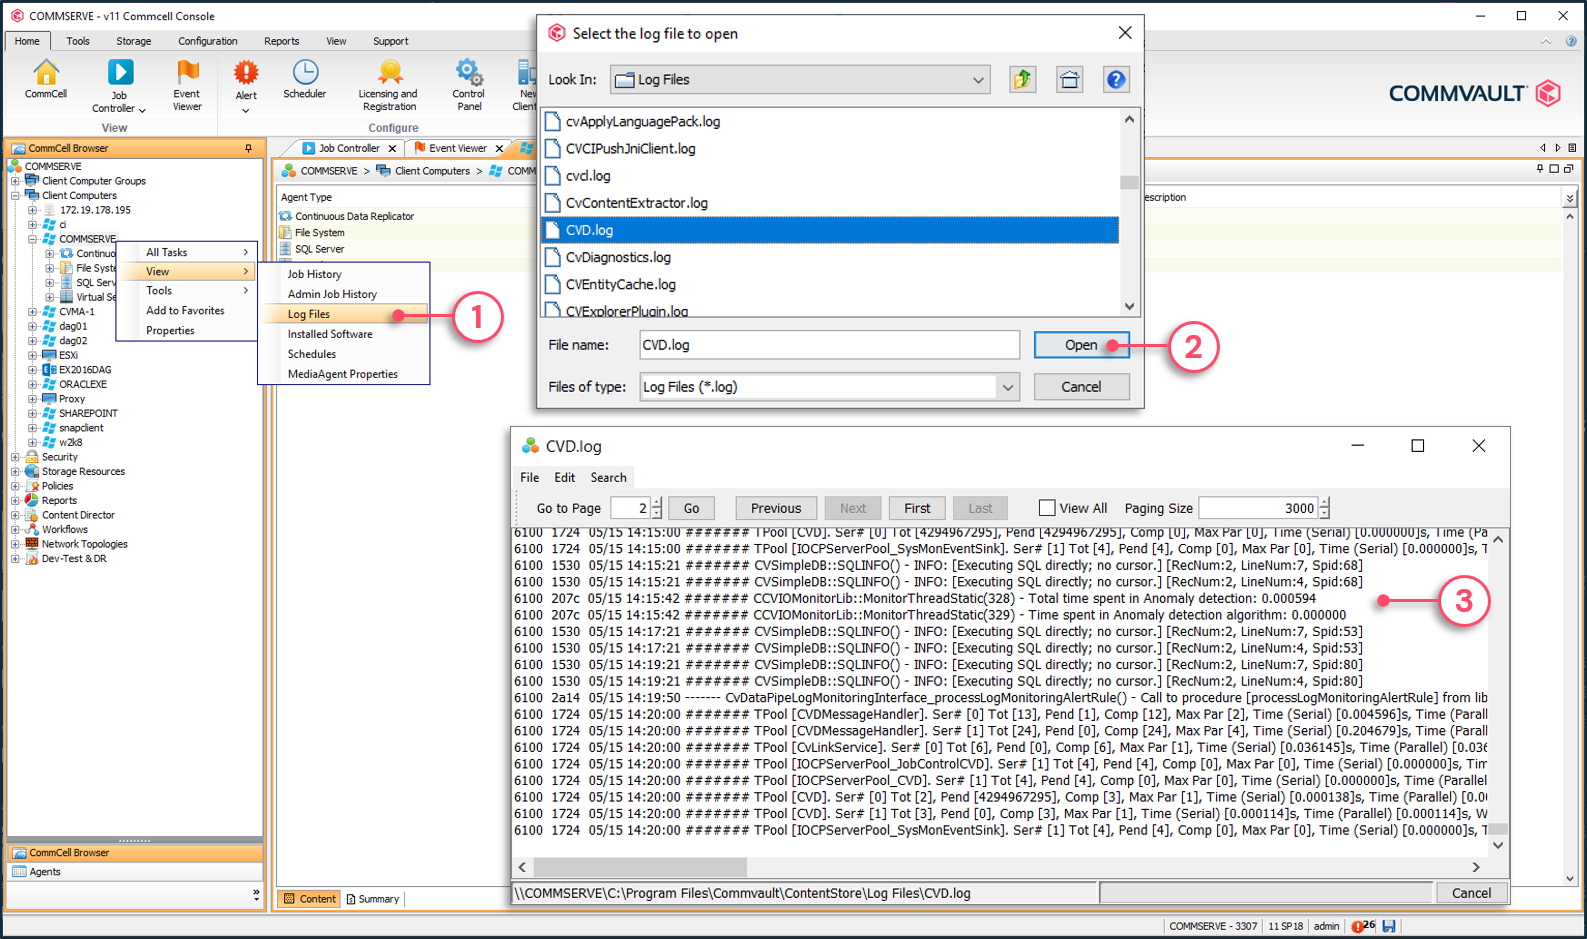
To view the log files of a client
1 - Right-click the client | View | Log Files.
2 - Select the desired log file and click Open.
3 - Displays the log file content.

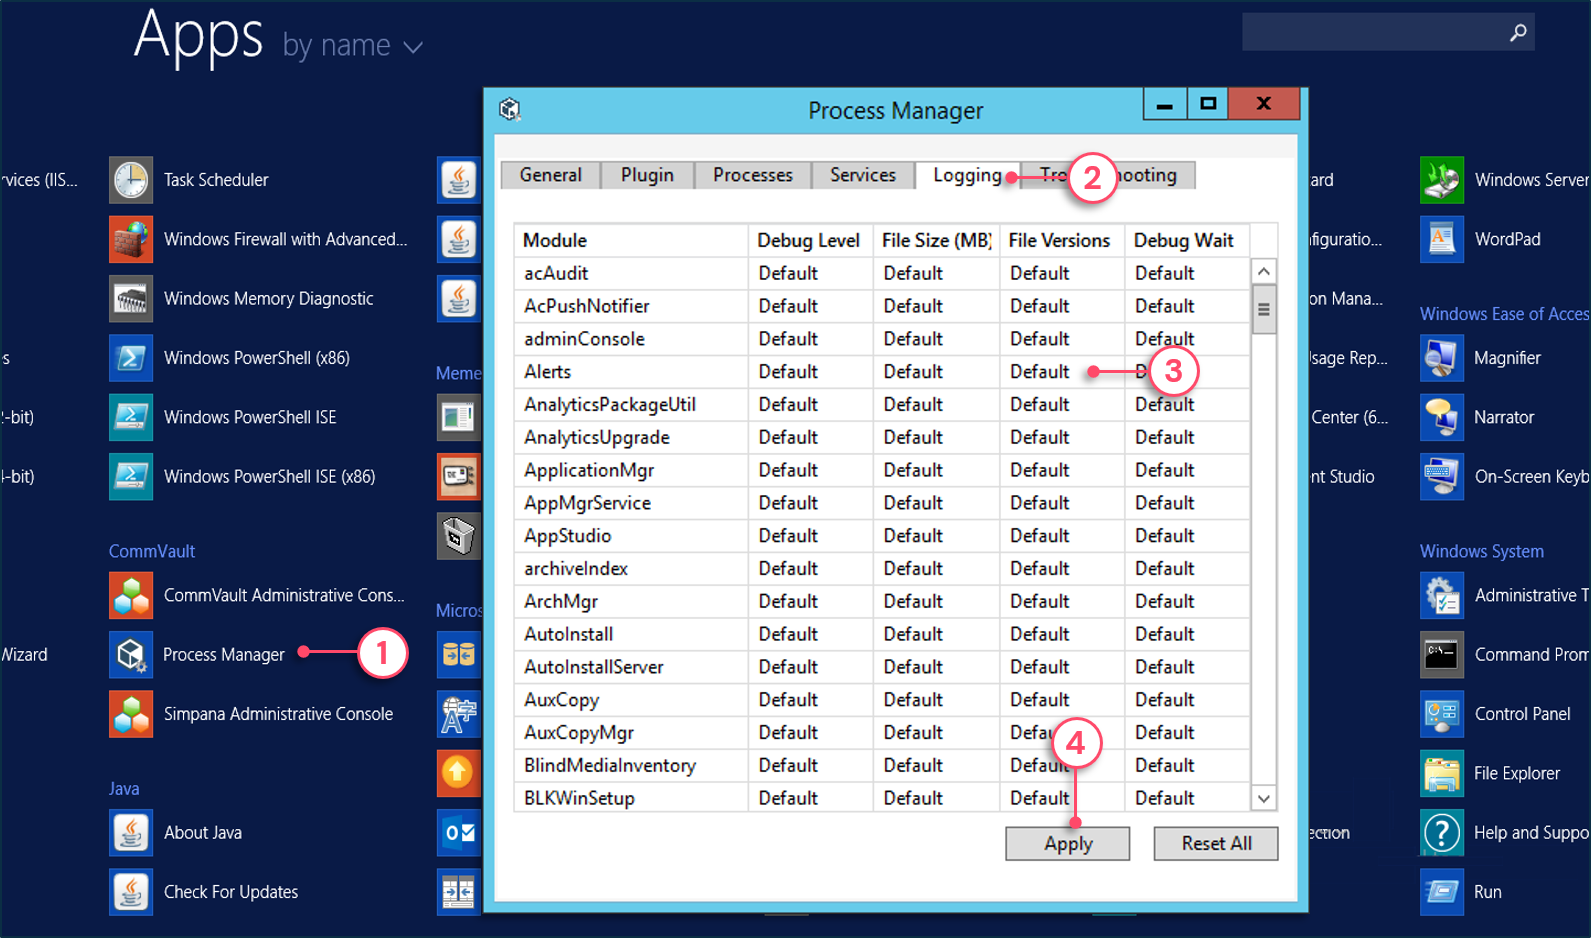
The Process Manager Logging tab
1 - From the Apps tiles window | Click Process Manager.
2 - Click the Logging tab.
3 - Click a field to set the debug level, maximum file size or maximum number of versions.
4 - Click Apply.
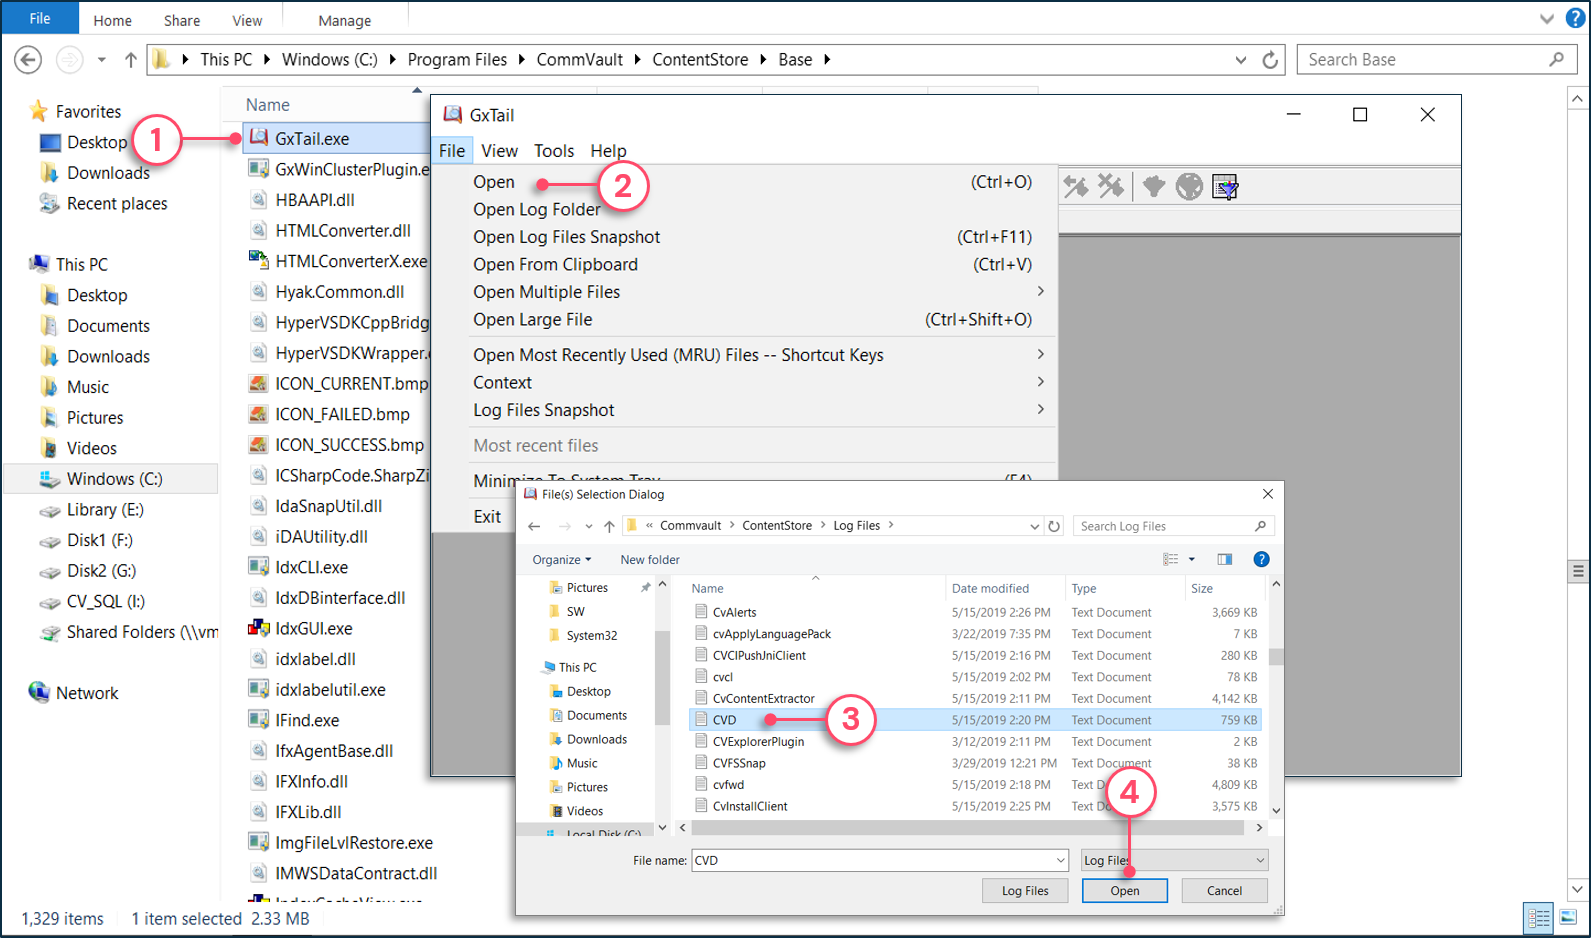
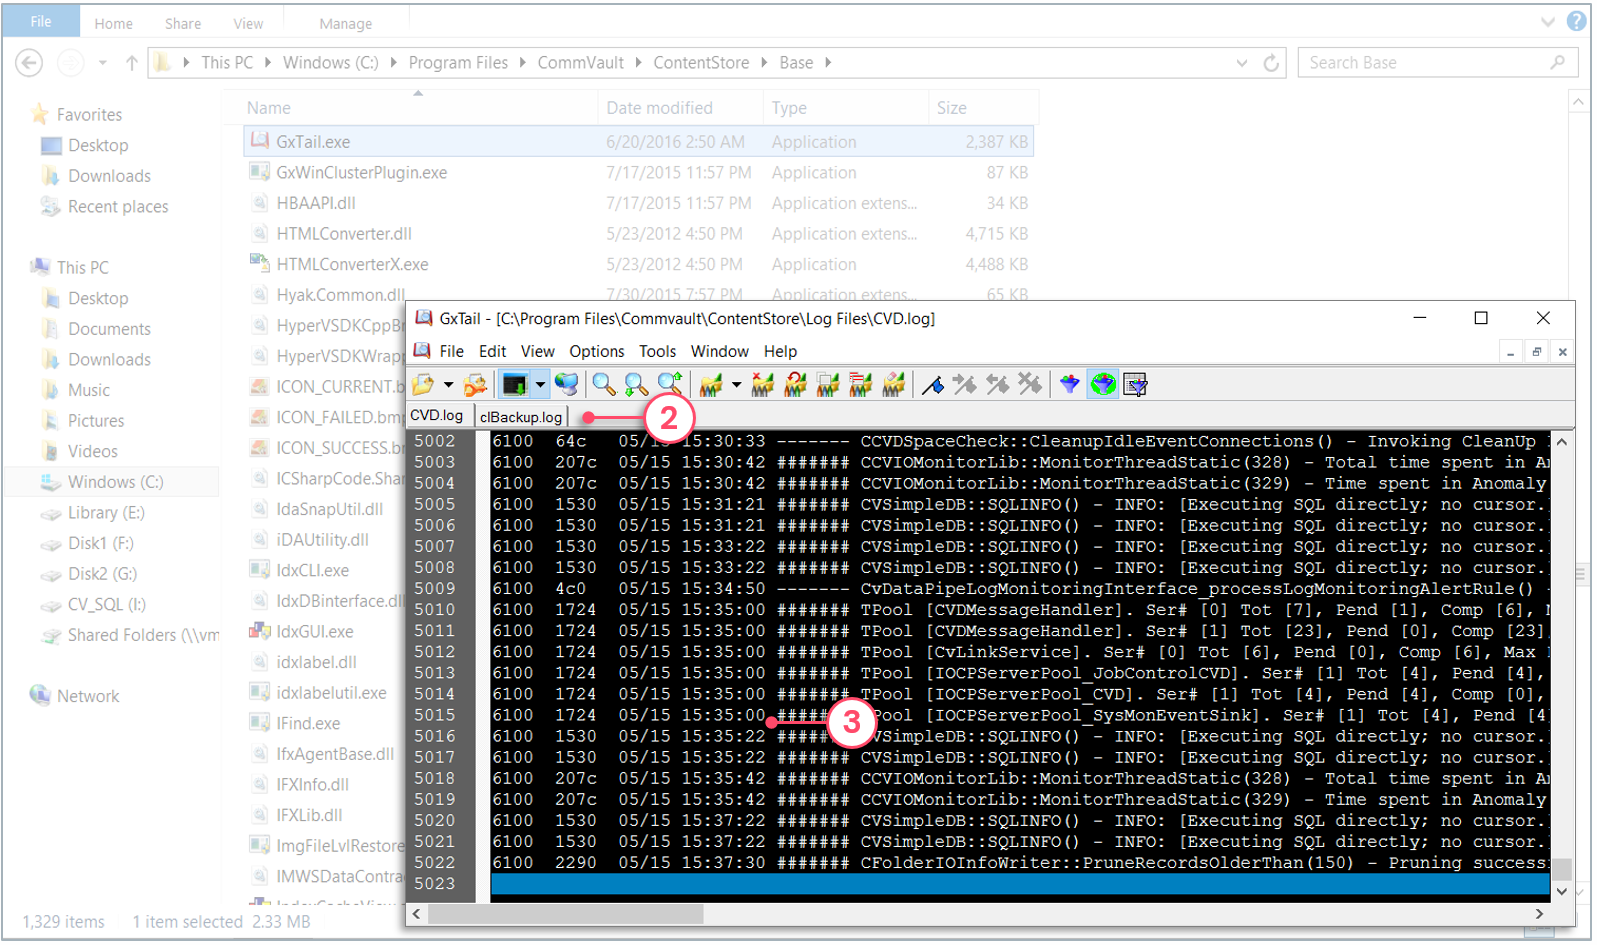
To launch GxTail
1 - Navigate to the Base folder and execute GxTail.exe.
2 - Click Open to view the log files.
3 - Select one or multiple log files.
4 - Click Open.
5 - Each log file is opened in a different tab.
6 - The content of the log file is displayed and refreshed in real time.
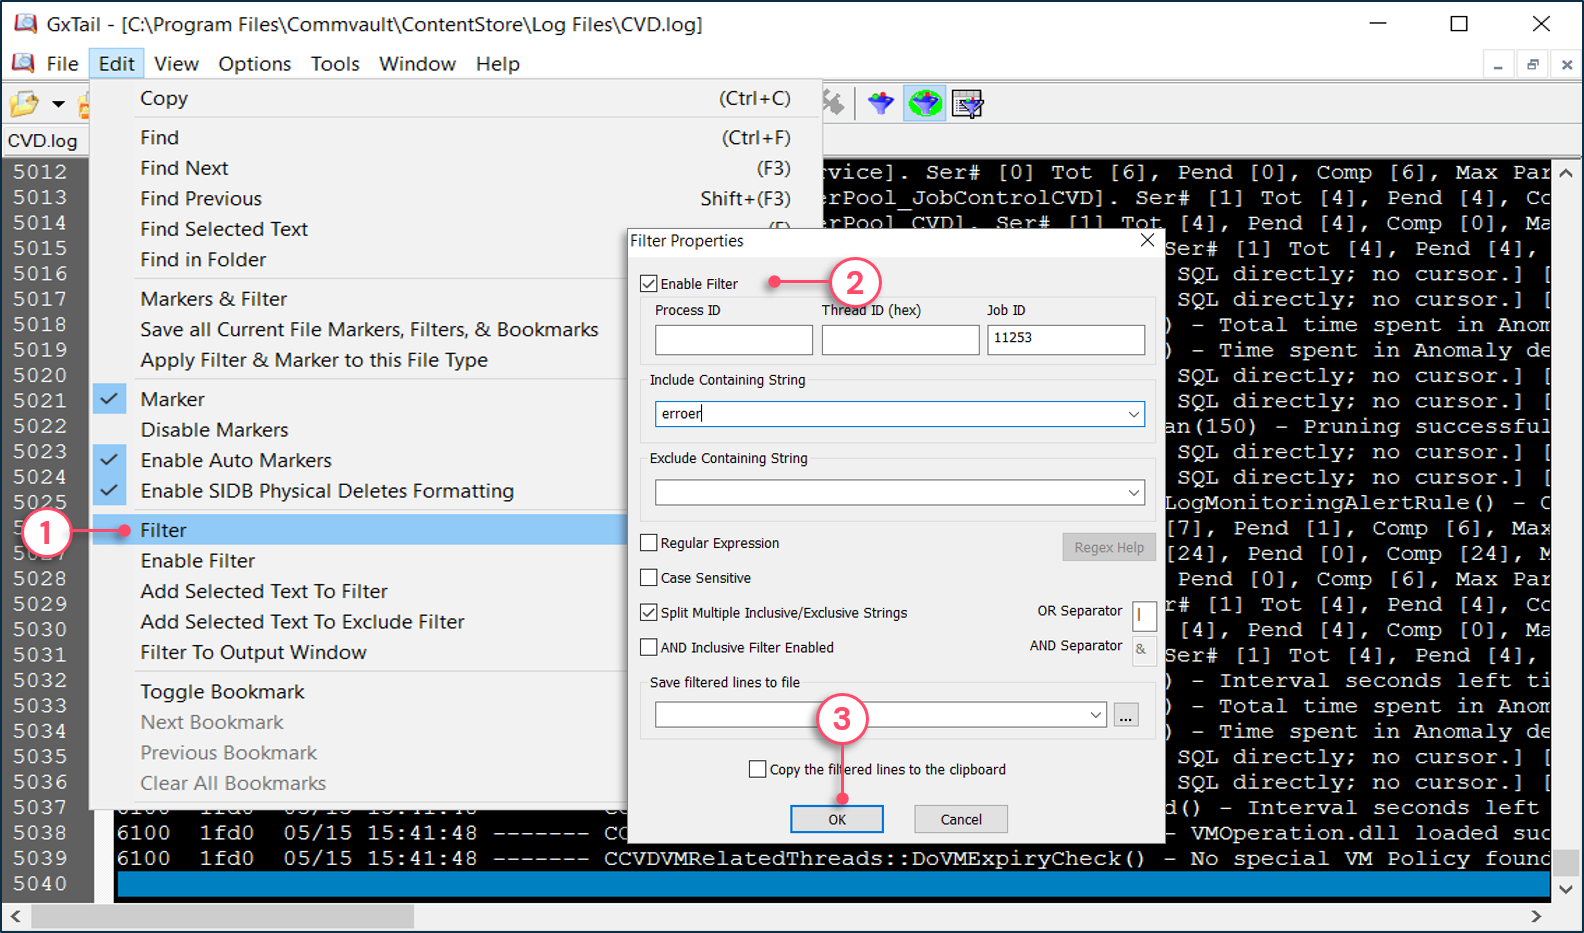
To apply filters to GxTail
1 - From the Edit Menu | Filter.
2 - Define any desired filter criteria.
3 - Click OK.
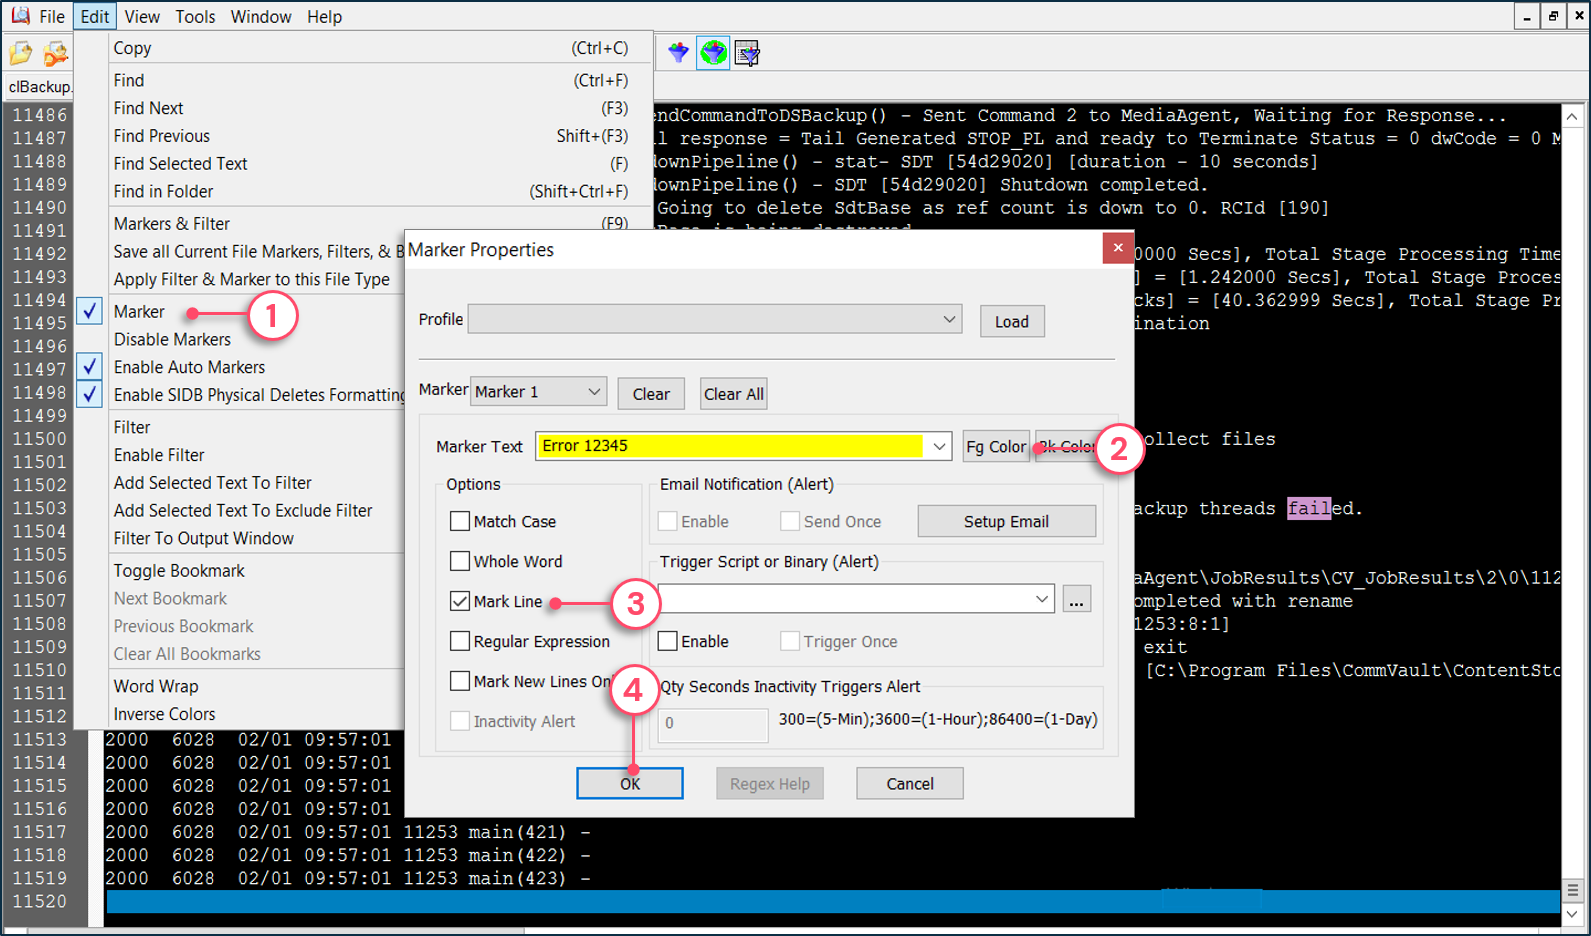
To apply markers to GxTail
1 - From the Edit Menu | Marker.
2 - Type the text to mark and choose a color from the drop-down list.
3 - Choose desired marker options, such as marking the line instead of just the string.
4 - Click OK.
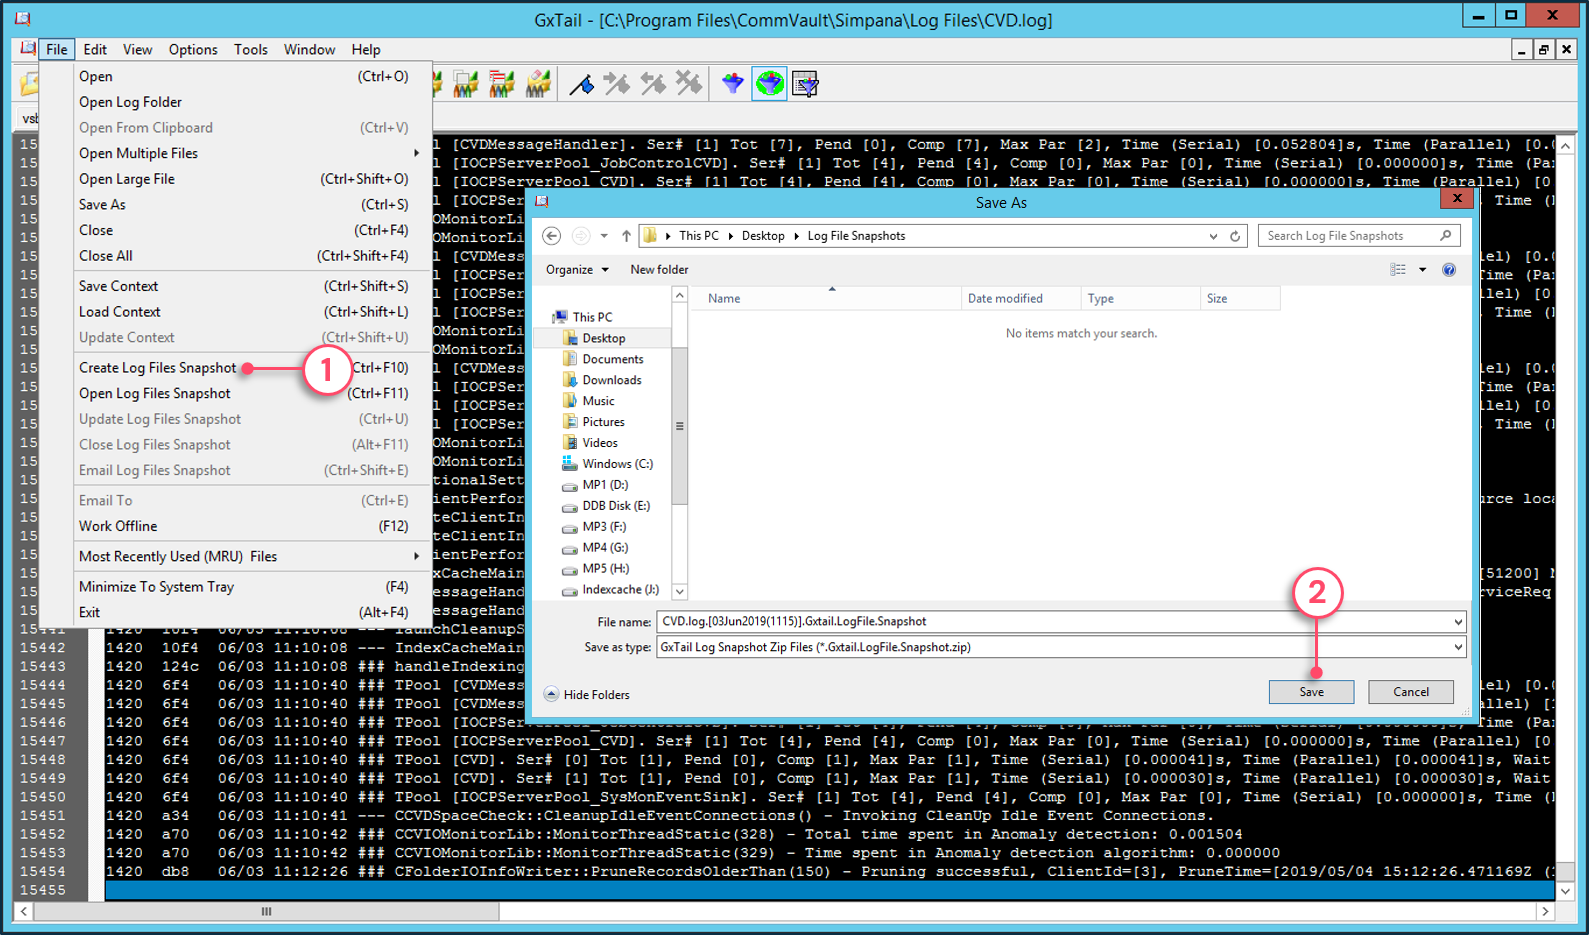
To create a log files snapshot
1 - From the File Menu | Create Log Files Snapshot.
2 - Select the destination and click Save.
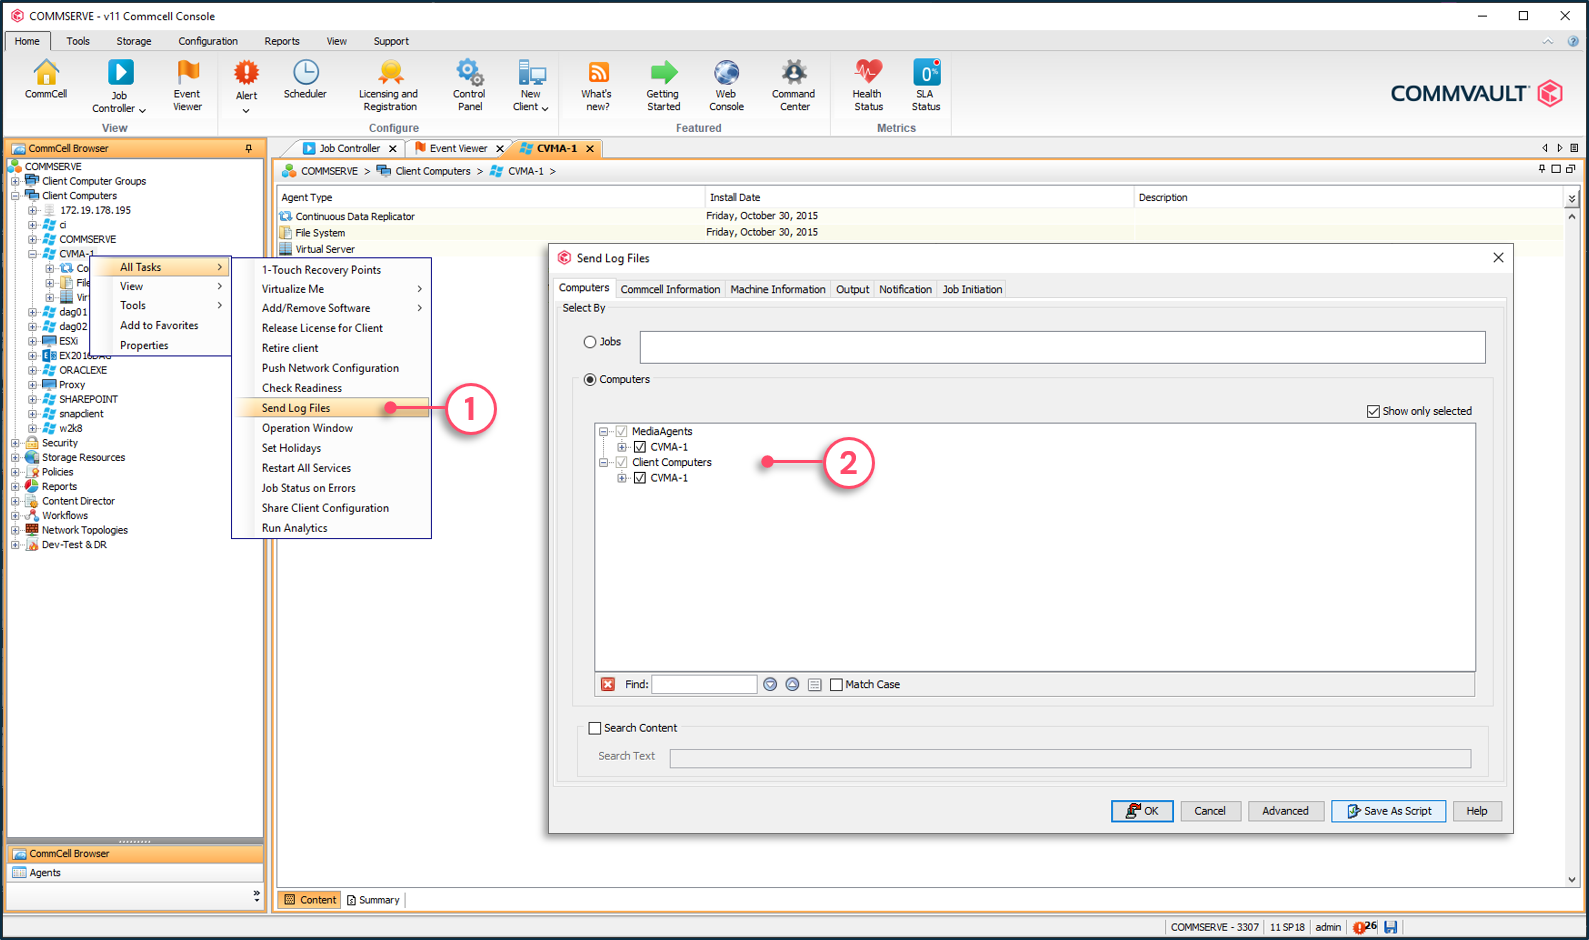
To send logs to support
1 - Right-click a job in the Job Controller or an entity in the CommCell® browser | All Tasks | Send Log Files.
2 - Select the computers/components for which to send logs.
3 - Select to send a copy of the CommServe® server database with the logs.
4 - Select to run a DR backup and send the latest copy of the database.
5 - Select to include other CommServe® server databases.

6 - Select to send the entire log files folder.
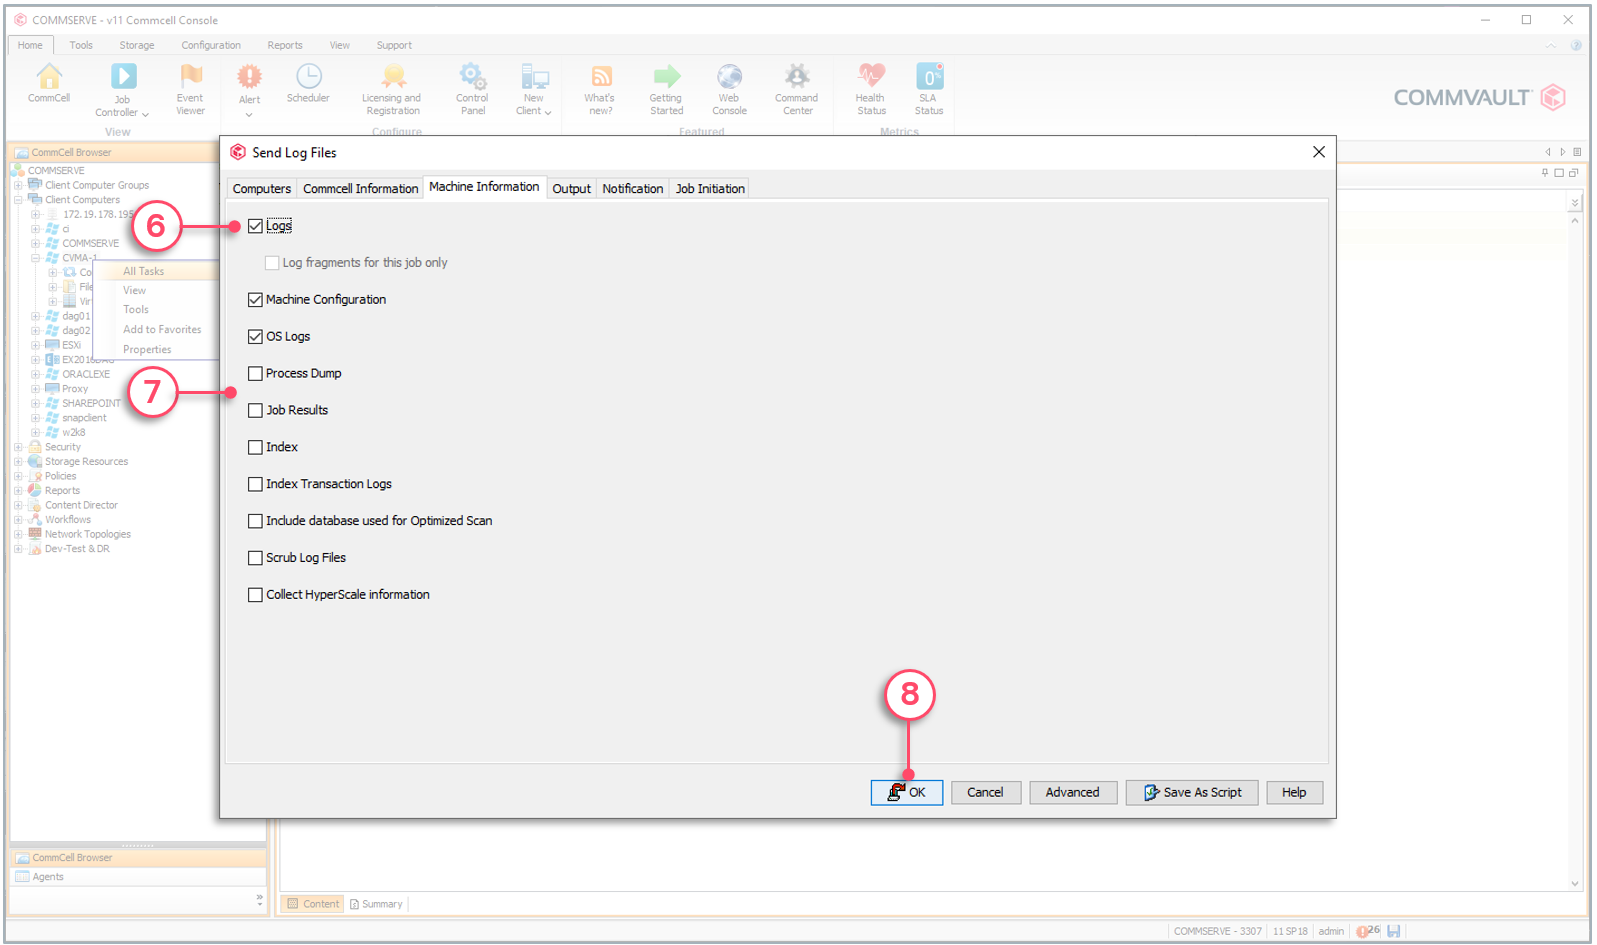
7 - Select any additional information to send along with the logs.
8 - Click to send the logs.
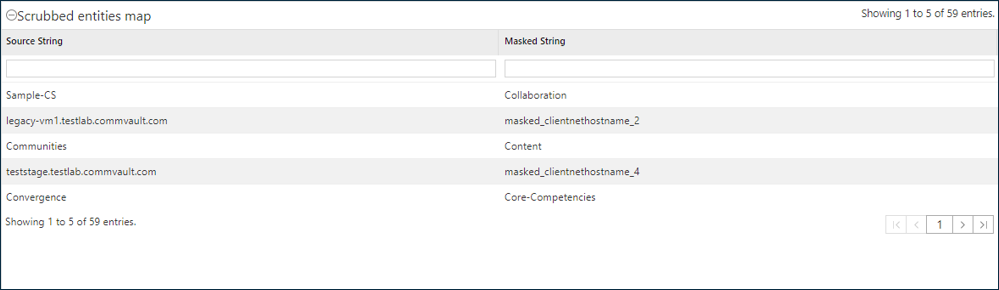
To scrub sensitive data from logs
1 - Right-click a job in the Job Controller or an entity in the CommCell® browser | All Tasks | Send Log Files.
2 - Check to scrub the log files and CommServe® server database, if applicable.

Sample of the scrub map report
1 - Masked strings are replaced by system generated names.
Copyright © 2021 Commvault | All Rights Reserved.